Overview
This guide assumes your are familiar with Ethereum and mining Ether. It will walk you through the entire process of building, assembling and installing an Ethereum mining rig running the Ubuntu Server LTS operating system using NVIDIA graphics cards.
There are 3 main steps to the process:
Before beginning, it’s worth noting why one might choose to run Ubuntu for the operating system rather than say ethOS or Windows. Although other operating systems provide a slight boost in performance, having a machine running Ubuntu will offer the advantage of an open source, general purpose computing environment.
This means that the maintenance of the machine for things like upgrades and security updates are straightforward to perform and the machine can be repurposed for other activities should mining become unprofitable. For example, if you have nvidia GPUs, then you can make use of the CUDA platform support to train machine learning models.
Purchasing the hardware
Below is a list of hardware used to build a 6 GPU mining rig with links for purchasing. Feel free to adapt this list based on part availability, cost, or computational improvements. This is intended as a starting point. There are other cheaper and more efficient choices than the below configuration. Note, many of the parts below may no longer be sold or are currently out-of-stock.
IMPORTANT: This list does not include a keyboard, mouse, or monitor as well as the associated cables you will need to connect the rig. It is assumed that existing ones already exist and can be repurposed or temporarily used in order to complete the OS and software installation.
| Part | Description |
|---|---|
| Processor | Intel Pentium G4400 Skylake Dual-Core 3.3 GHz LGA 1151 |
| Motherboard | MSI Z170A SLI Plus LGA 1151 Intel Z170 HDMI SATA 6Gb/s USB 3.1 ATX |
| Memory | Crucial 4GB 288-Pin DDR4 SDRAM DDR4 2133 |
| Hard Drive | Crucial MX300 2.5" 275GB SATA III 3D NAND Internal Solid State Drive (SSD) |
| Graphics Card | EVGA GeForce GTX 1070 FTW2 |
| Riser Card | eSynic 5 Pack PCI-E Riser Card |
| Power Supply | Thermaltake Toughpower XT 1275W 80PLUS Platinum |
| Frame | 6 GPU Mining Aluminum Case Rig Open Air Frame |
| Fans | APEVIA CF512S-BK 120mm 4pin & 3pin Black Silent Case Fan (5-pk) |
When purchasing your power supply and graphics card, pay attention to the power consumption and how many cards you are purchasing. The total draw from the cards should be around 80% of the wattage of your power supply. If the cards are pushing that limit then you should get multiple supplies or upgrade your power supply to a larger wattage rating. Also, some graphics cards have two 8-pin power connectors. (e.g. the NVIDIA 1070 FTW2’s linked above) If that is the case then you will likely need to purchase additional cables for your power supply that can support two 8-pin connections, such as the COMeap Replacement for ATX CPU 8 Pin Male to Dual PCIe 2X 8 Pin
The motherboard also needs to support the number of cards you are looking to connect. Some boards do not have the capacity on the PCI bus to support more than a few graphics cards, so be careful with your selection.
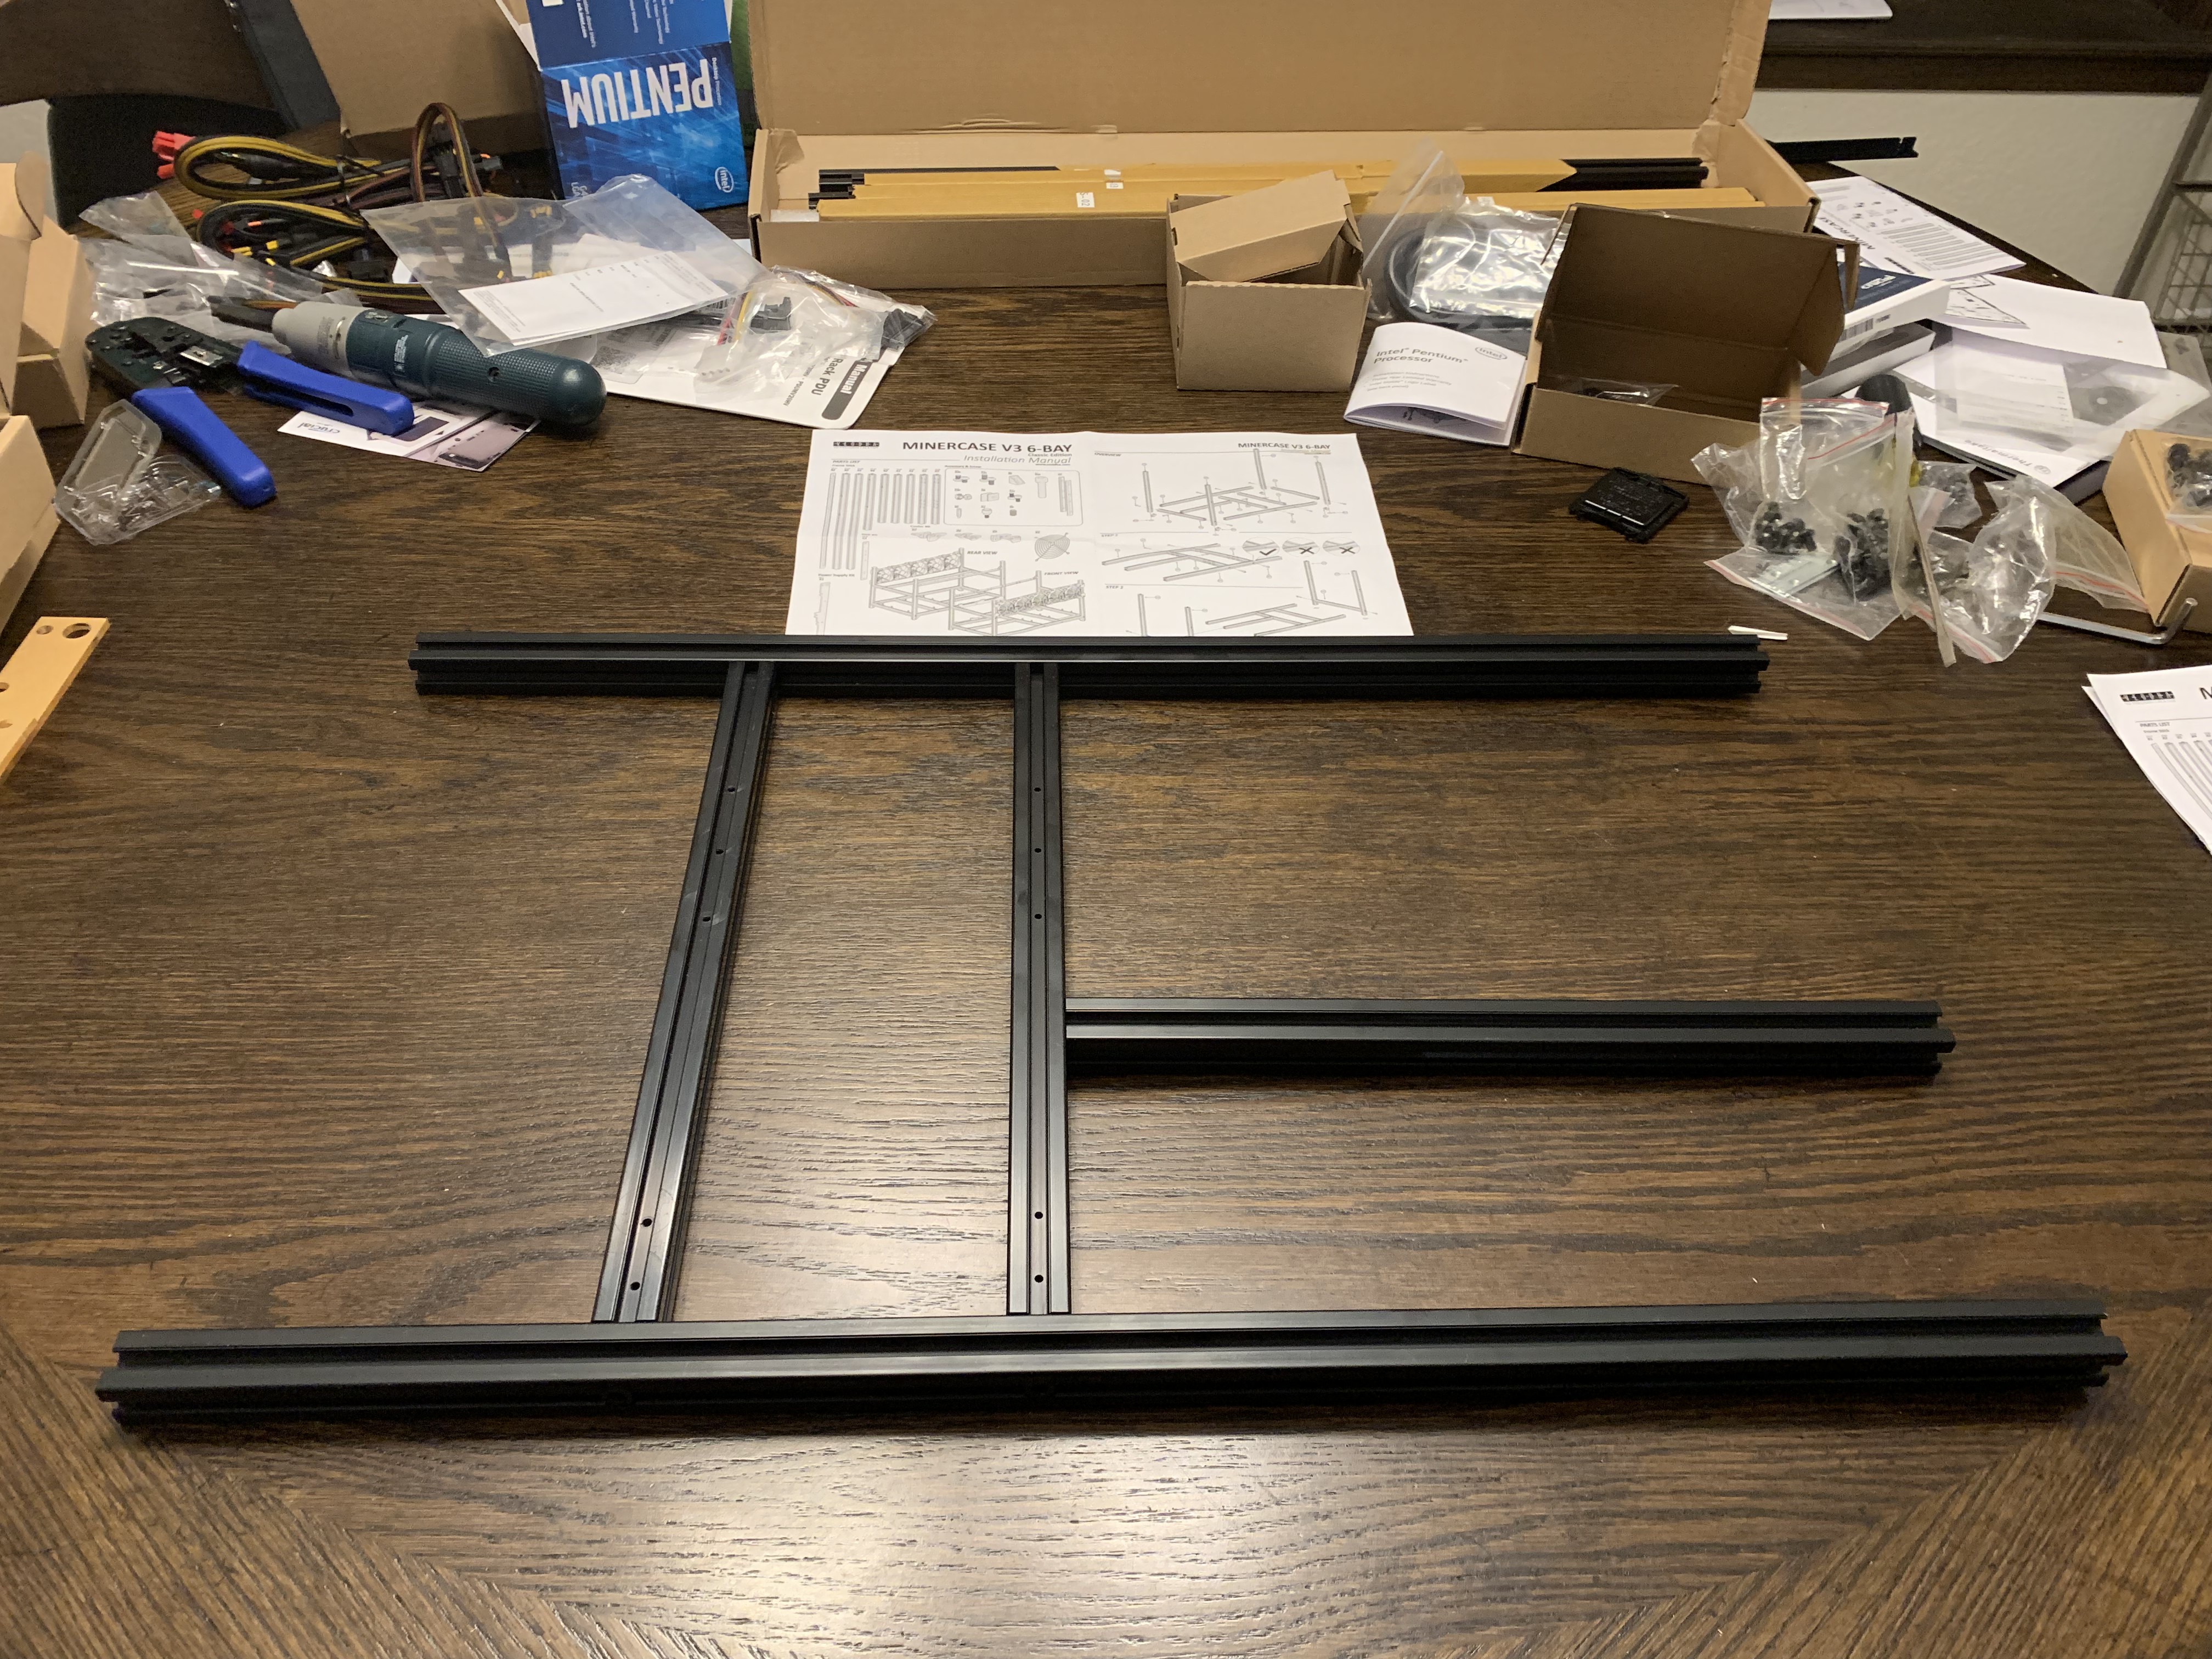
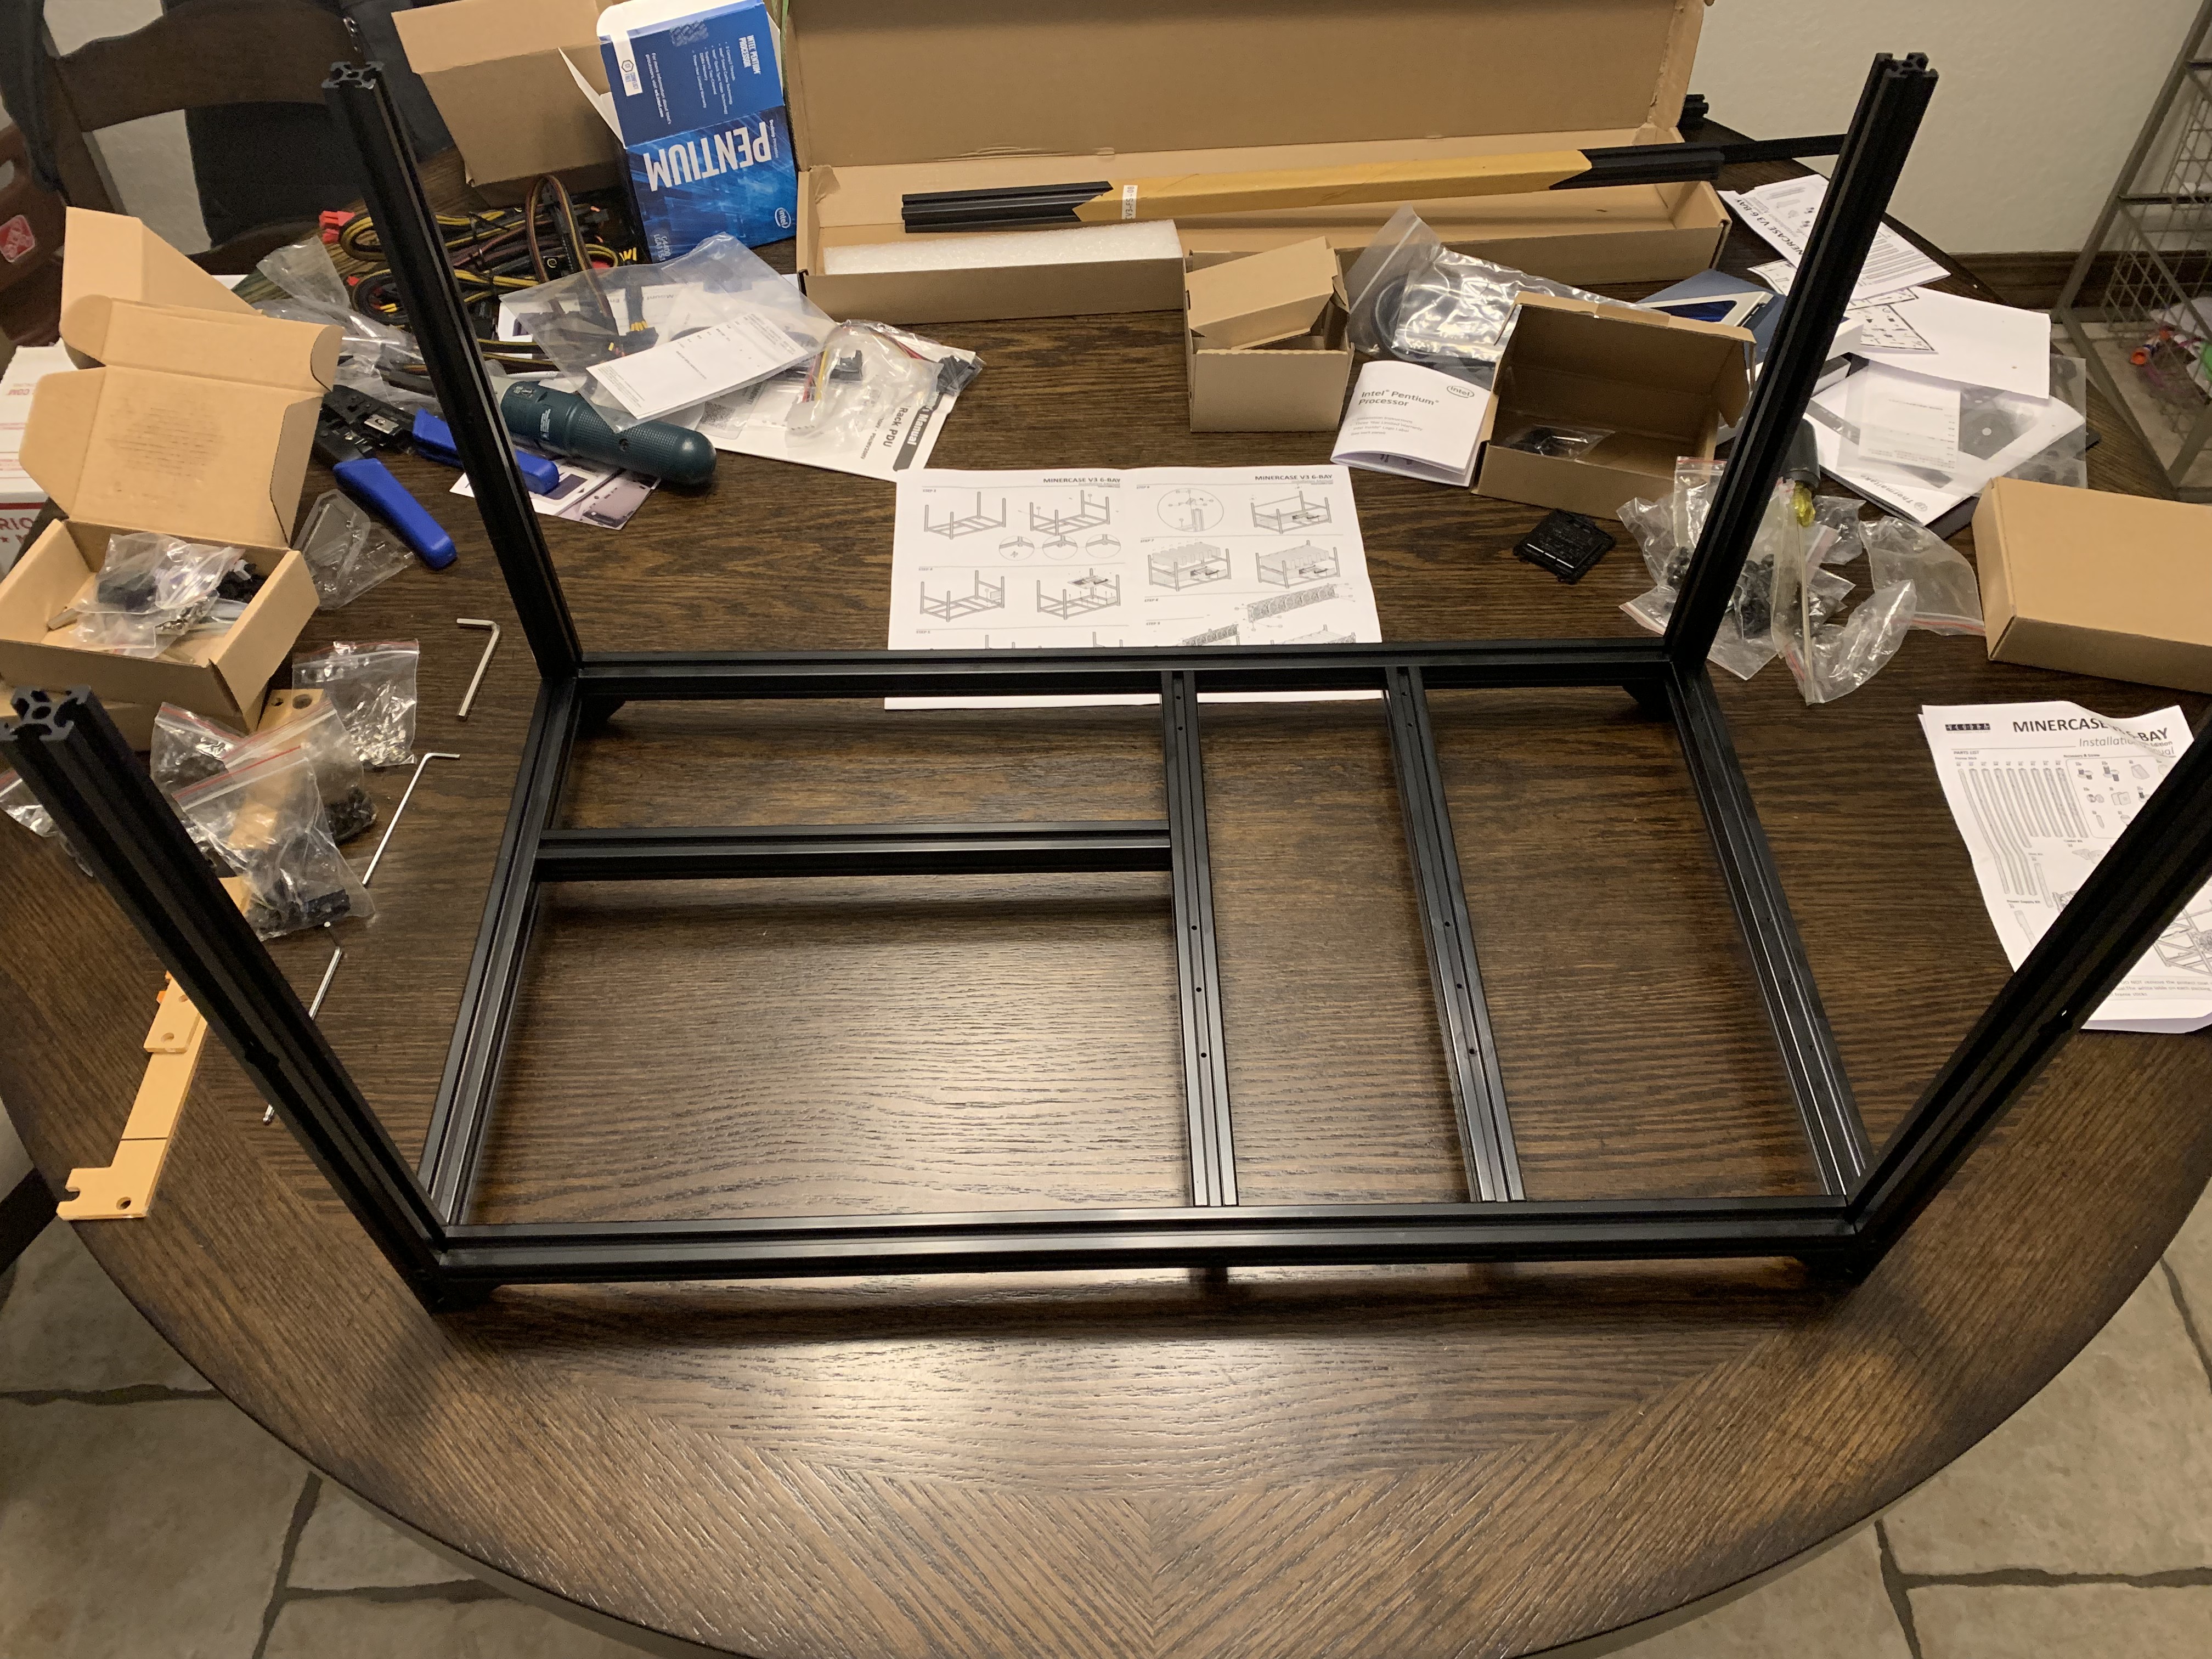
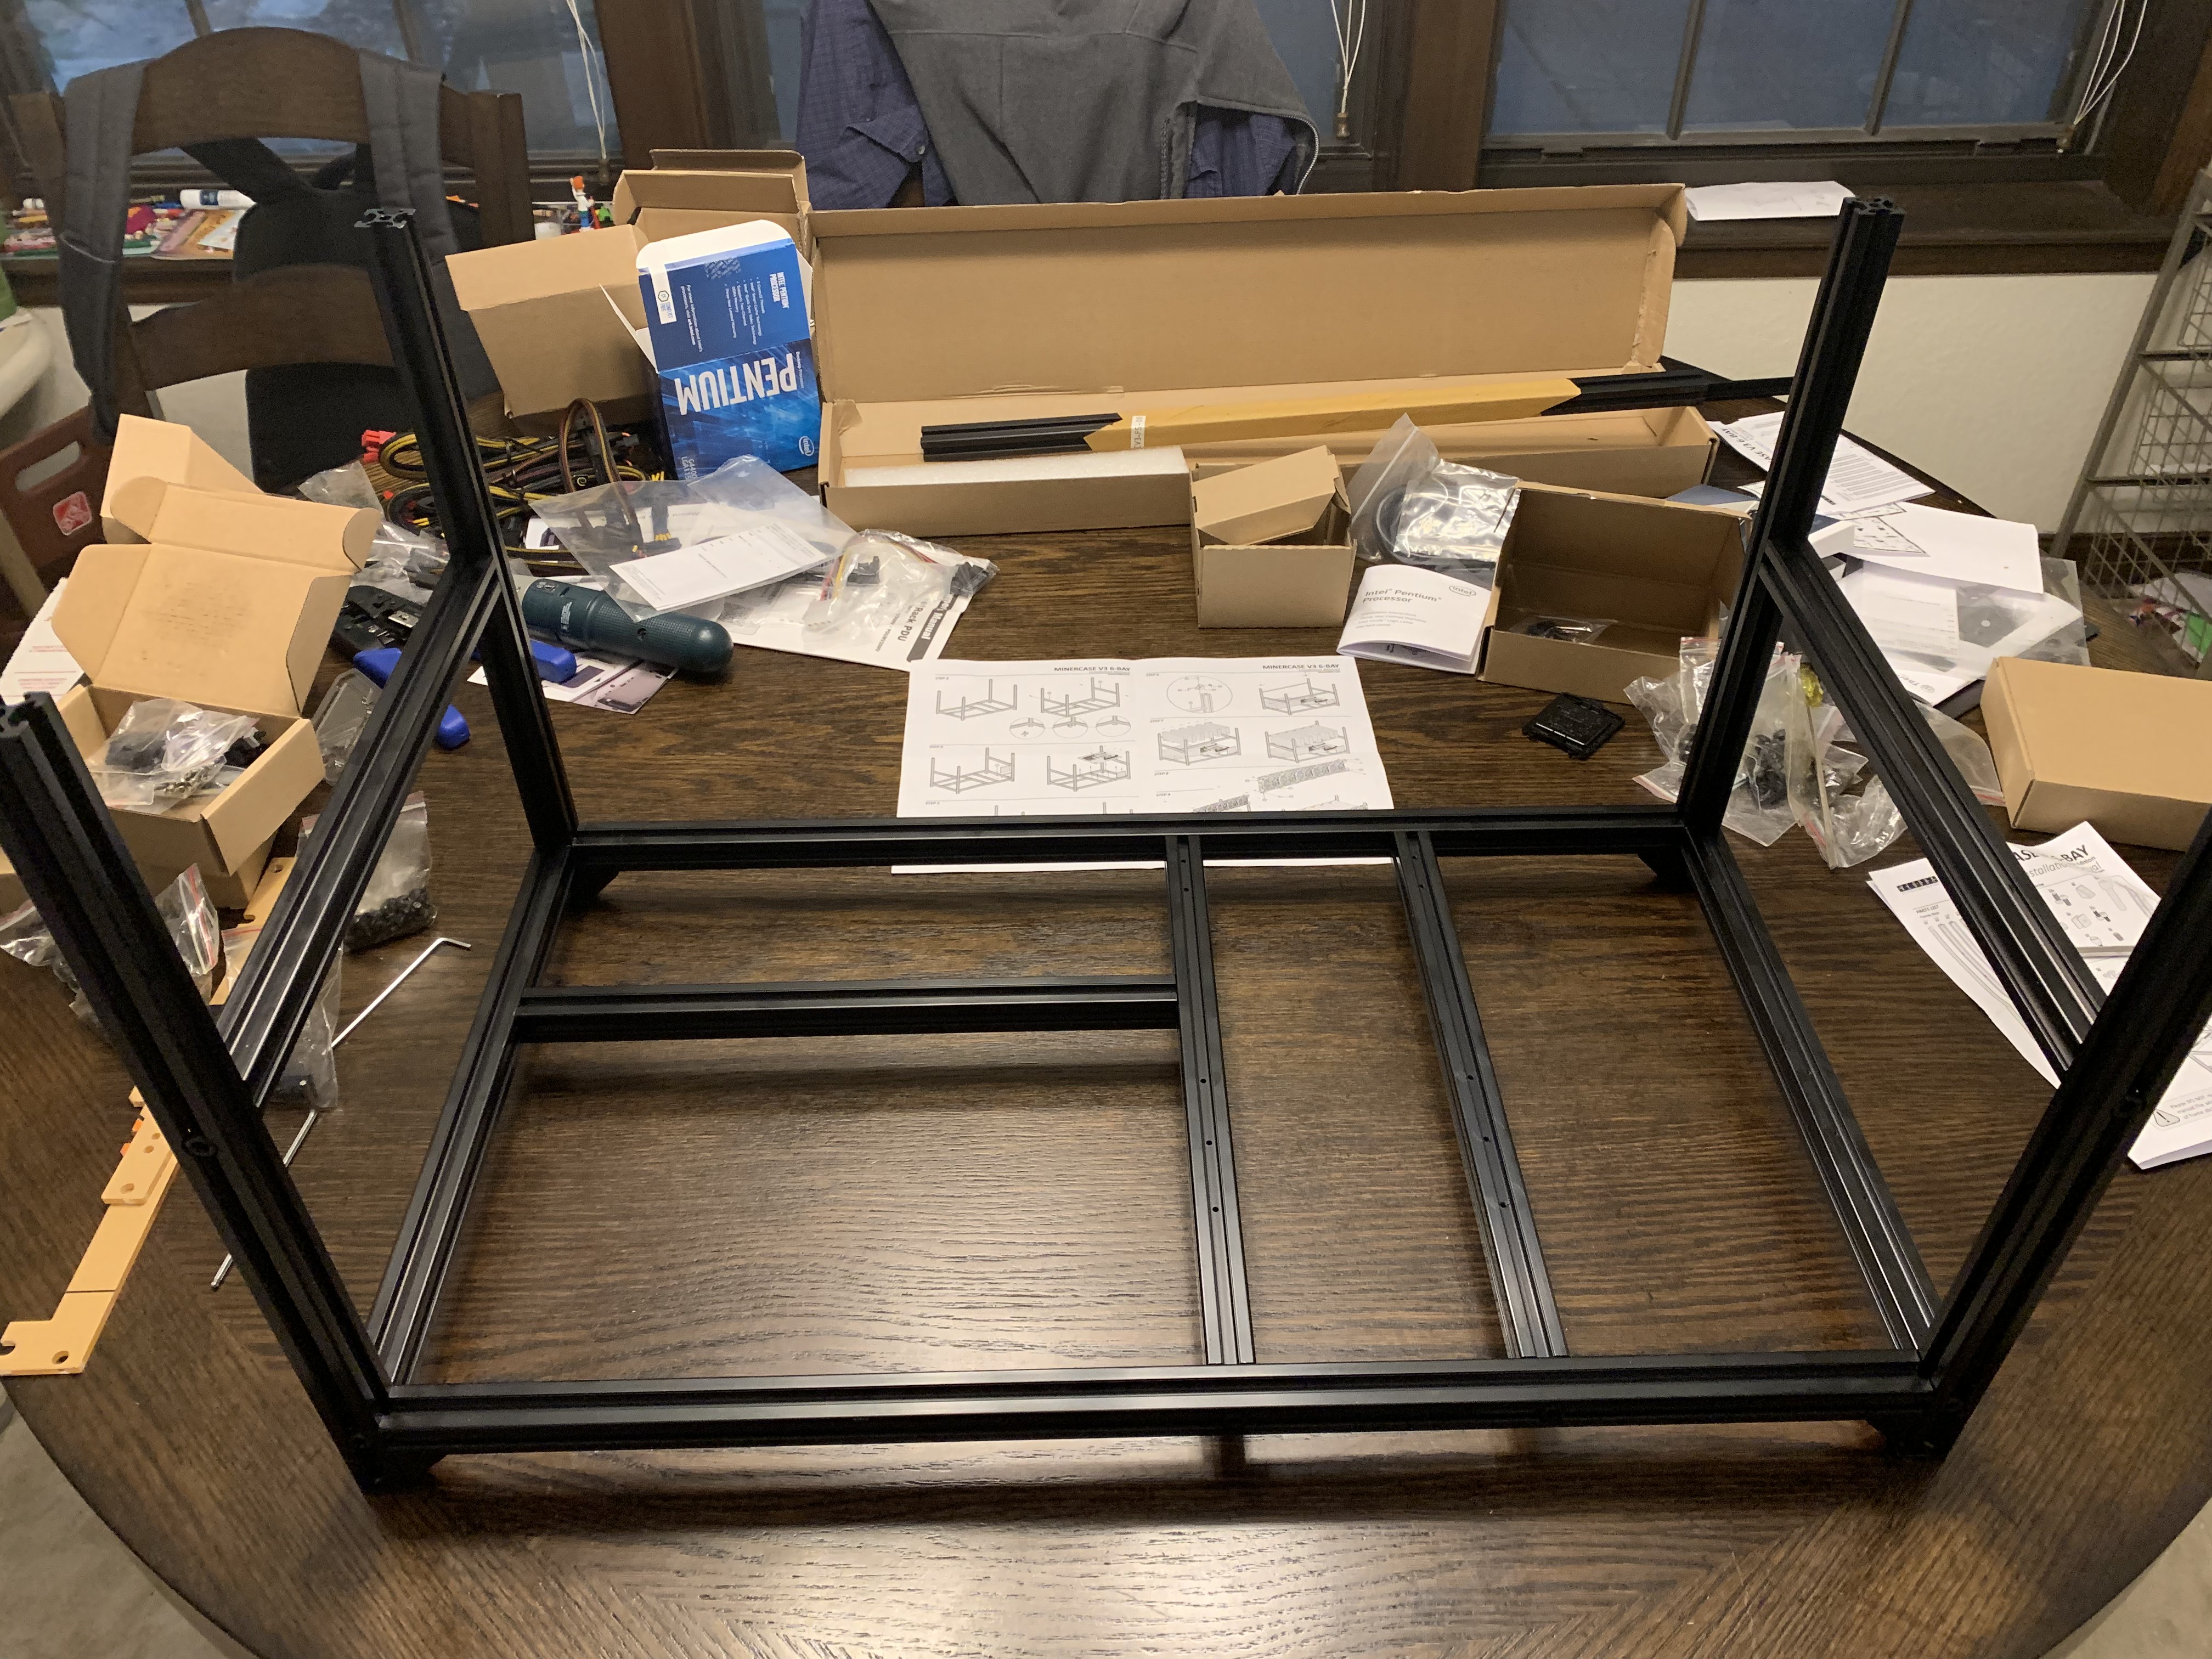
Assembling the machine
First, begin assembling the base of the frame. Many people choose to build their own frame out of wood or angled aluminum. To save time you can buy a frame online and just assemble it as we have done here.
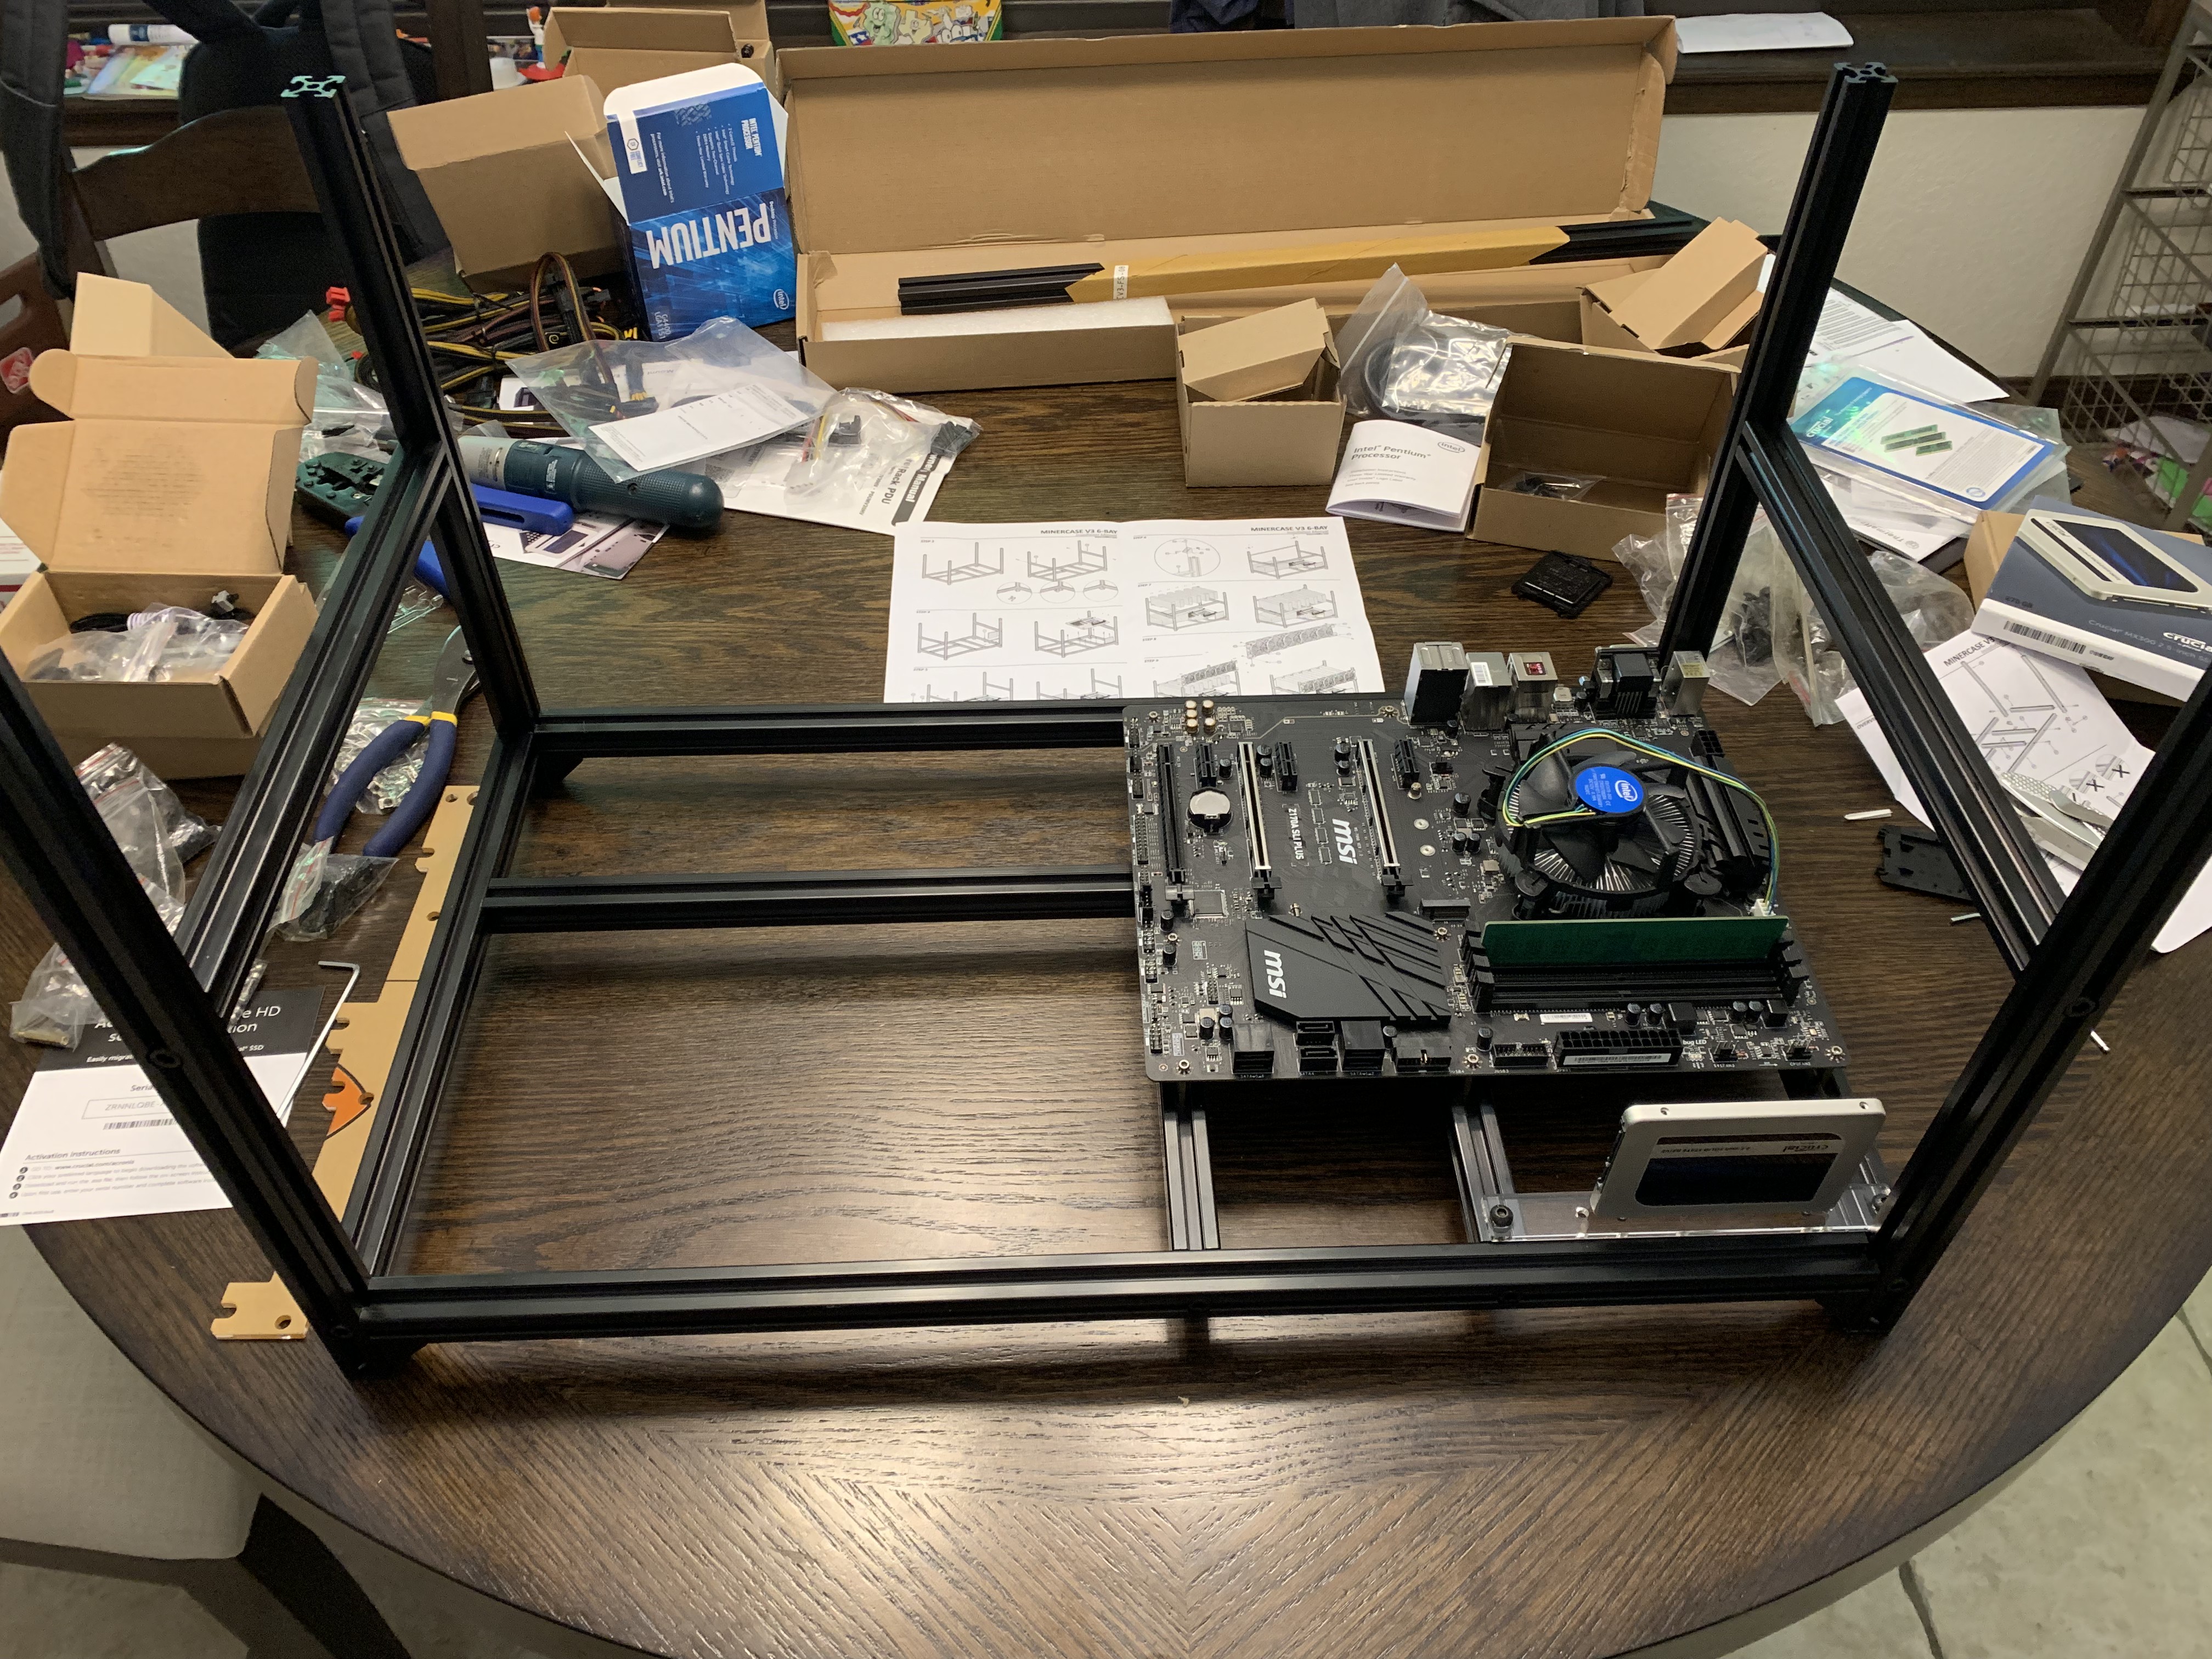
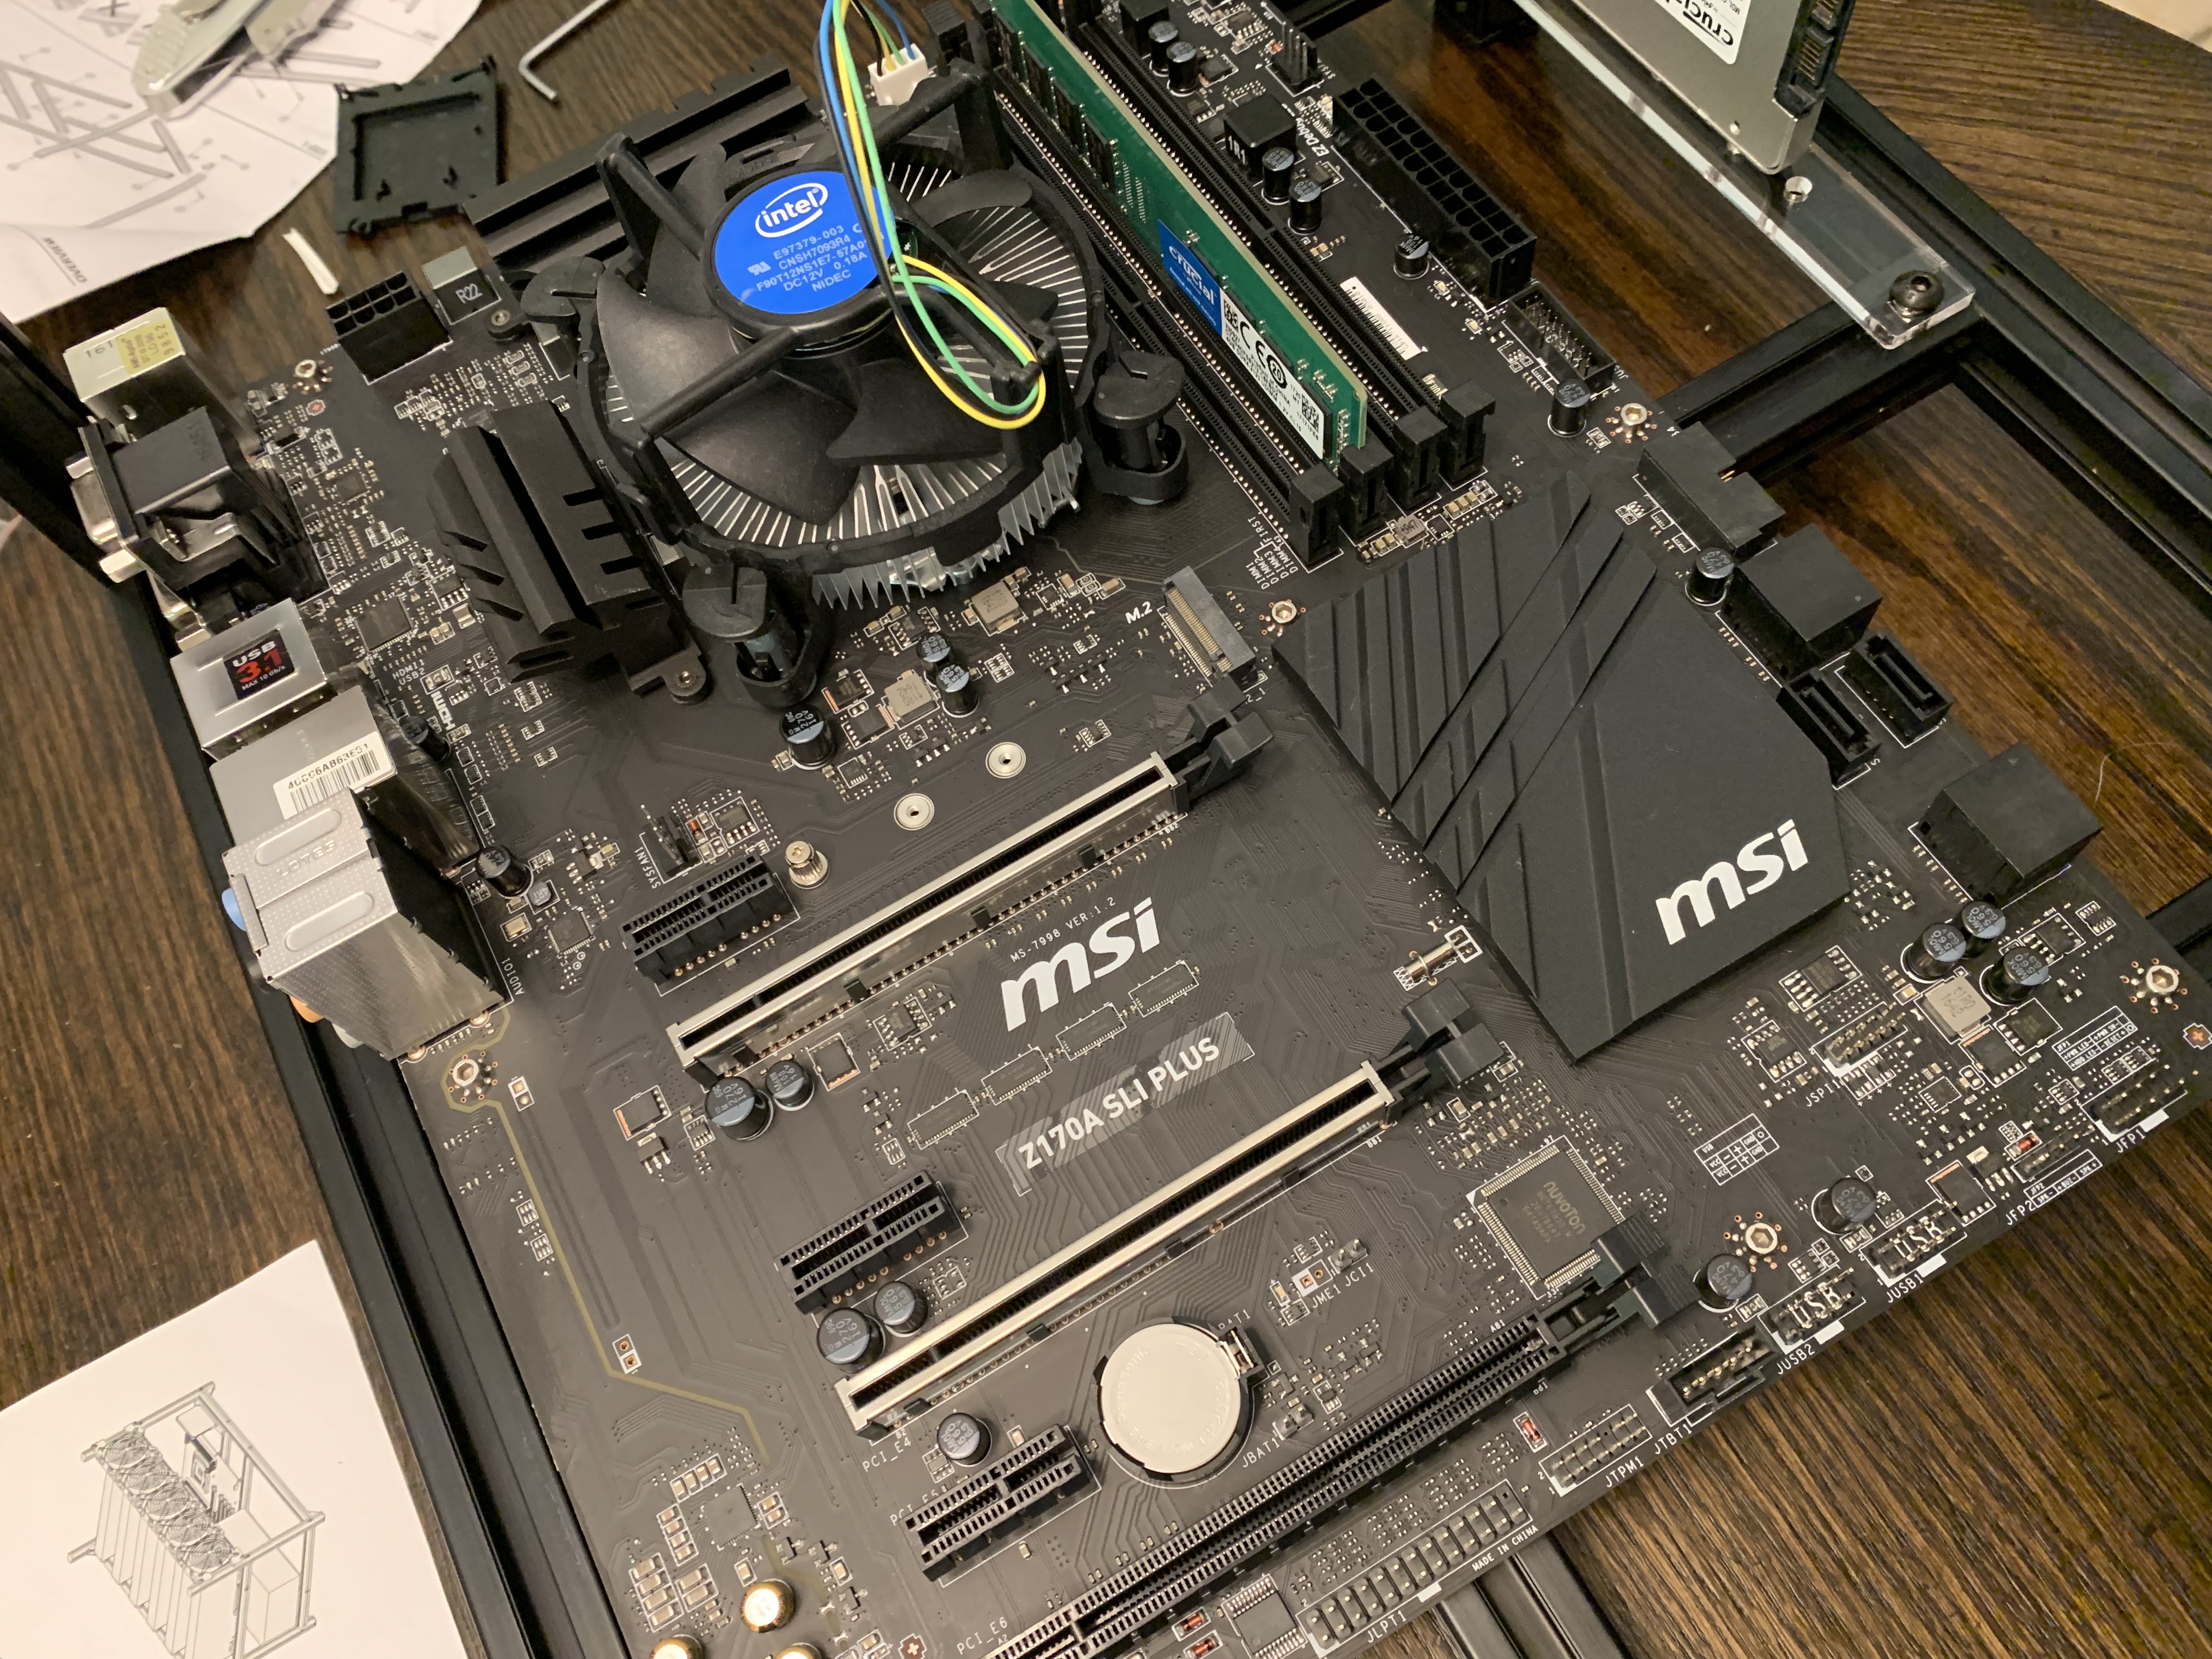
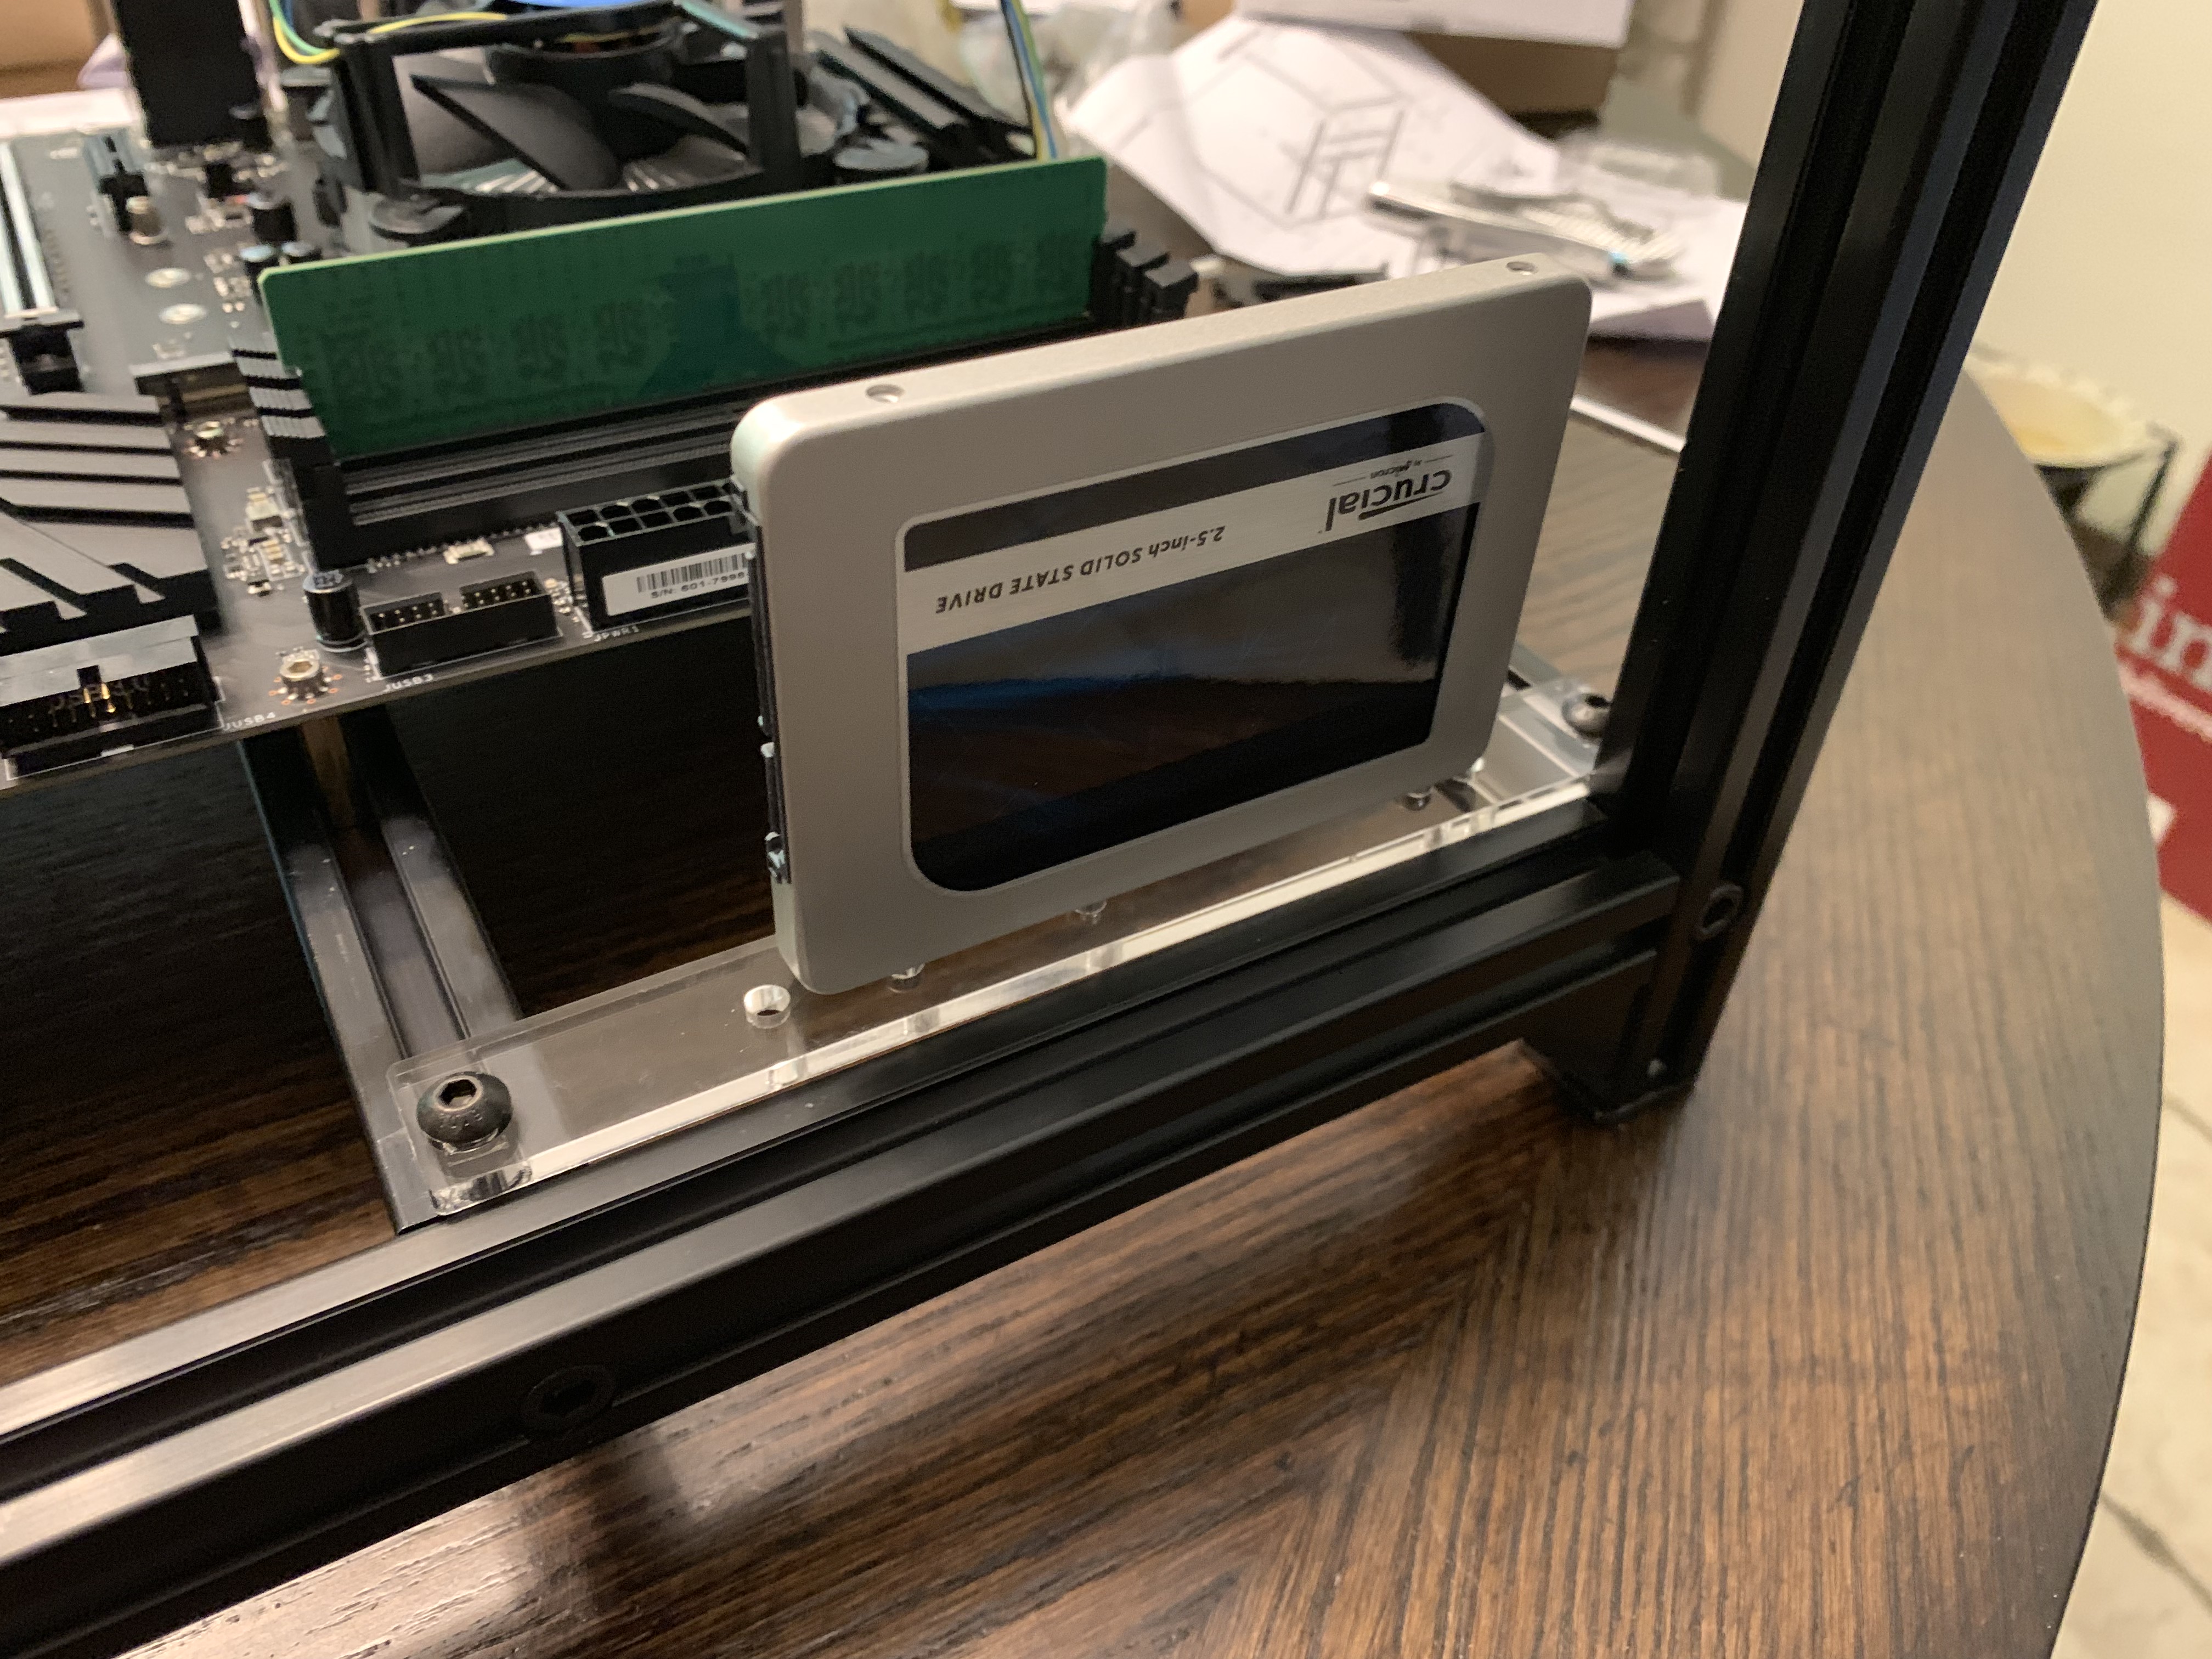
Next, attach the motherboard and the hard drive to the frame. Note, as part of this step you will also insert the memory into the slot(s) on the motherboard and install the processor and heatsink/fan combo. (Follow the provided instructions for your specific processor and motherboard)
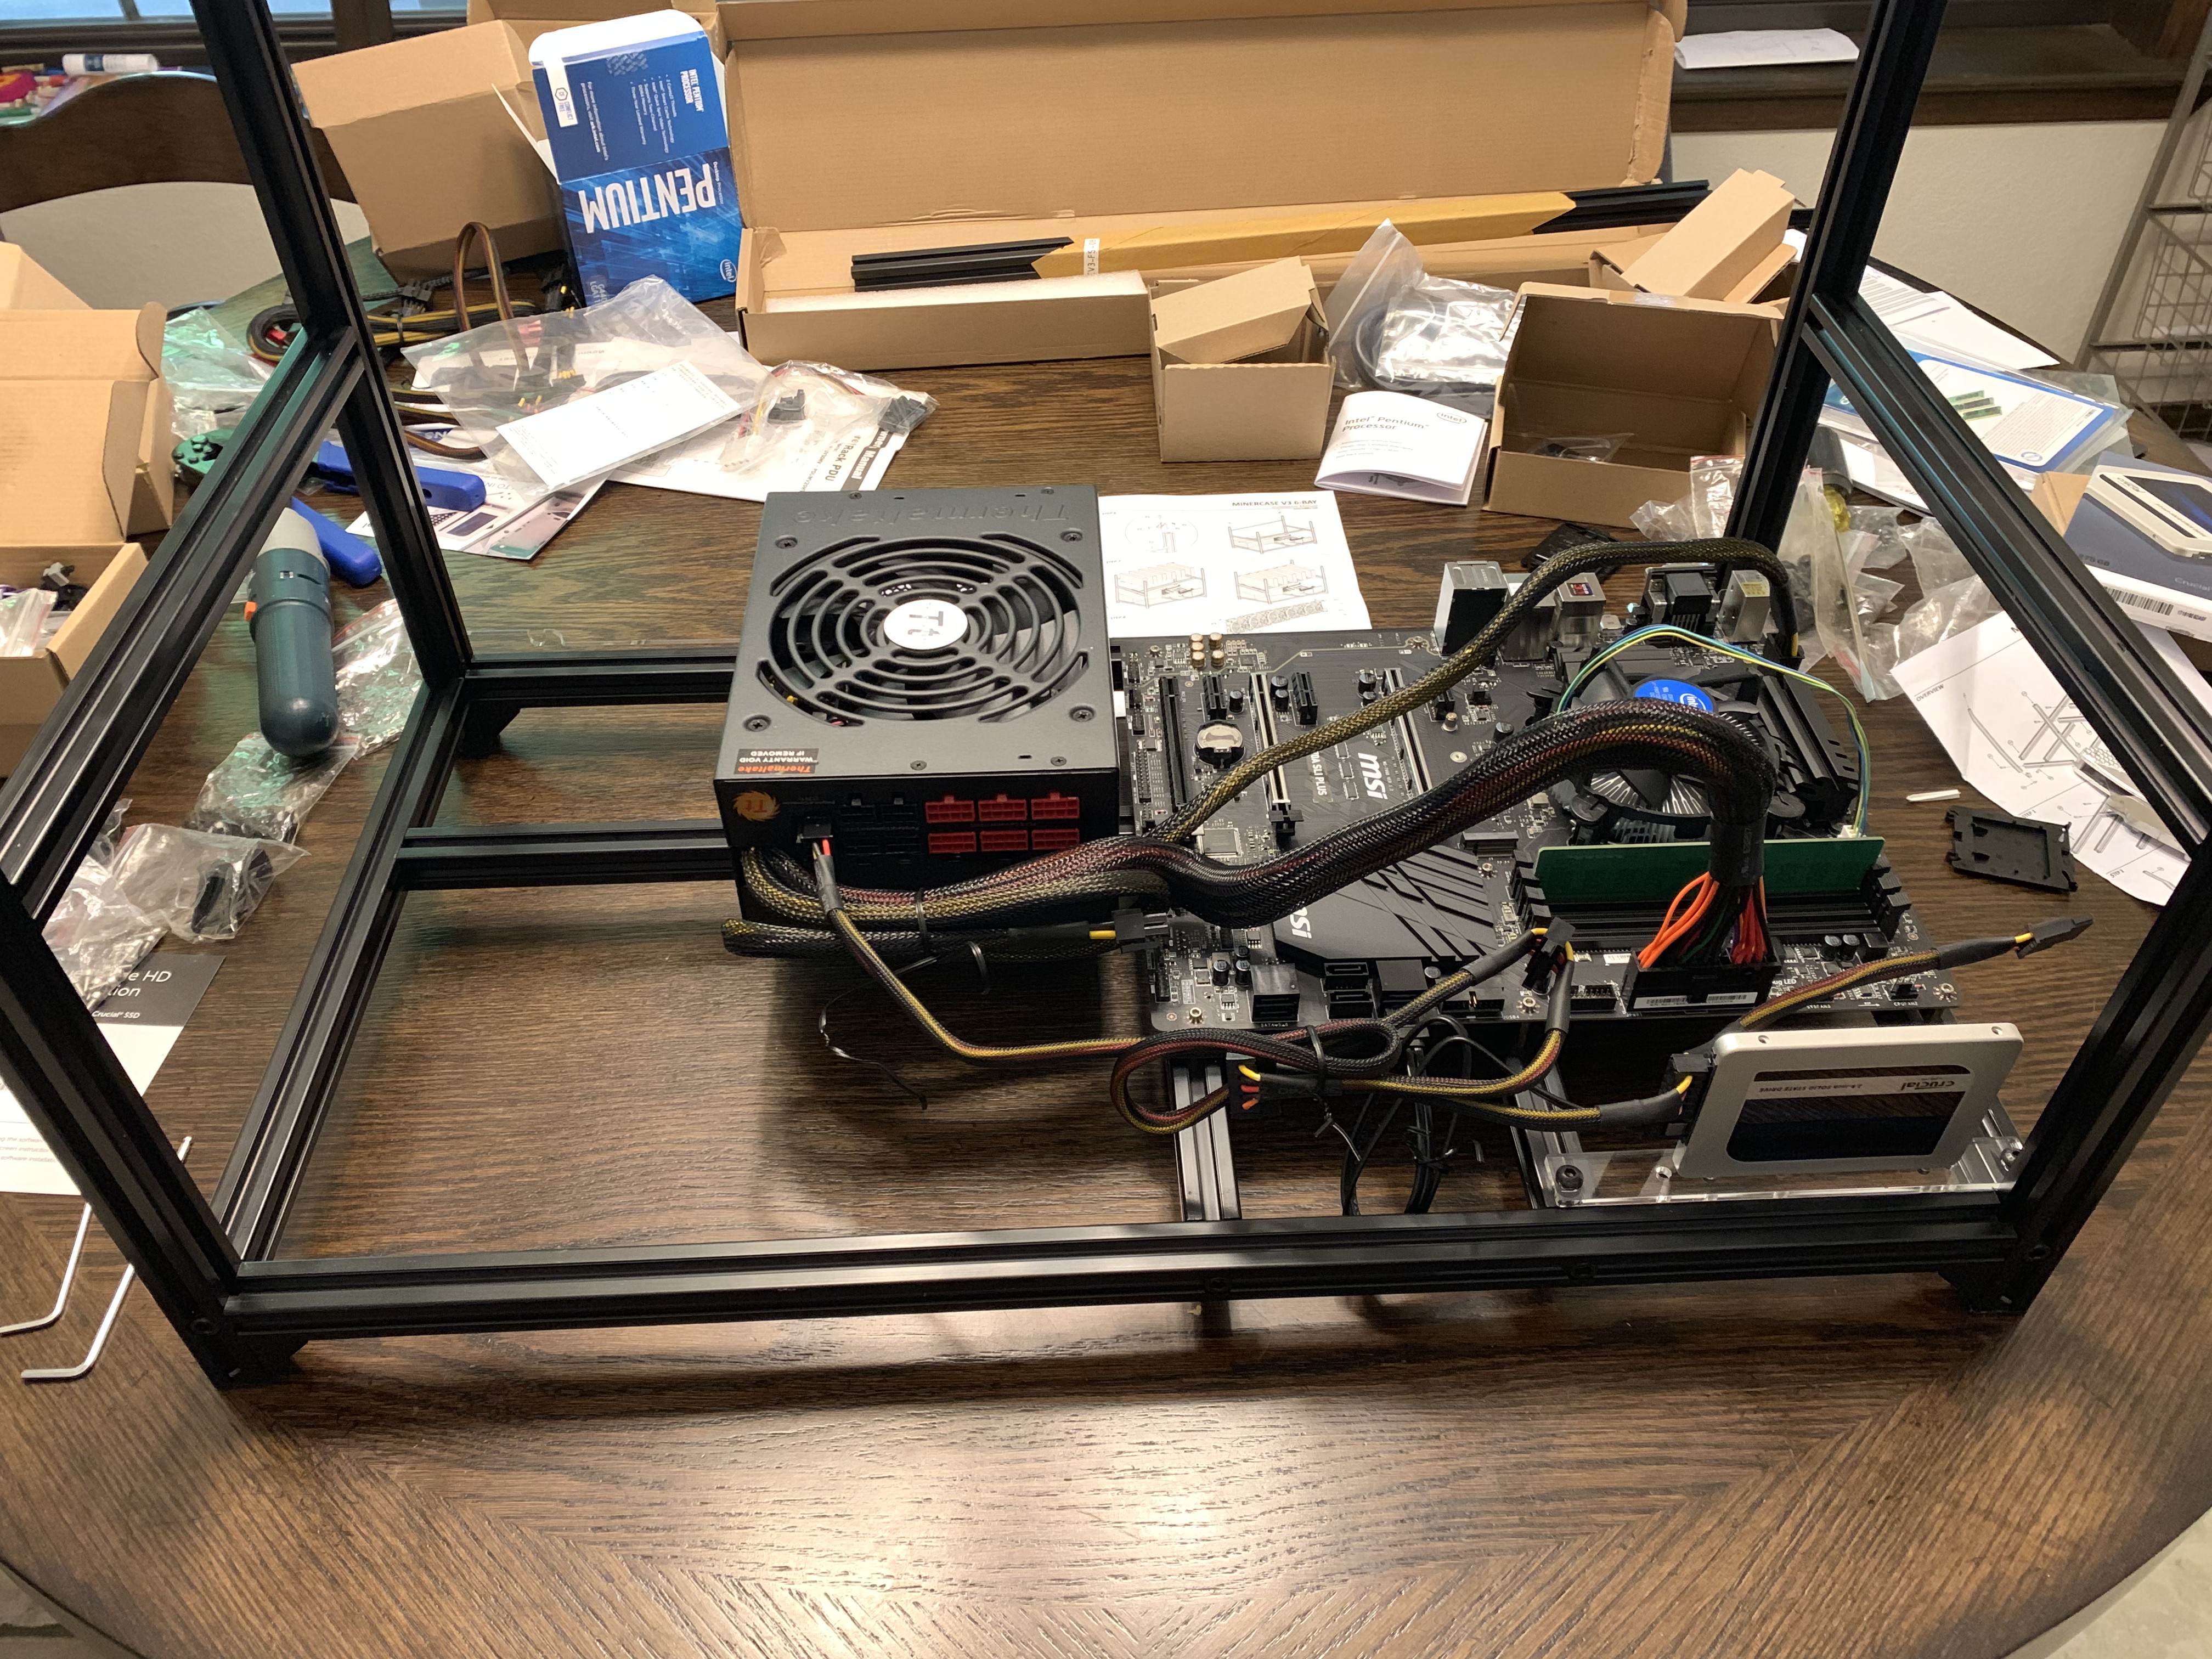
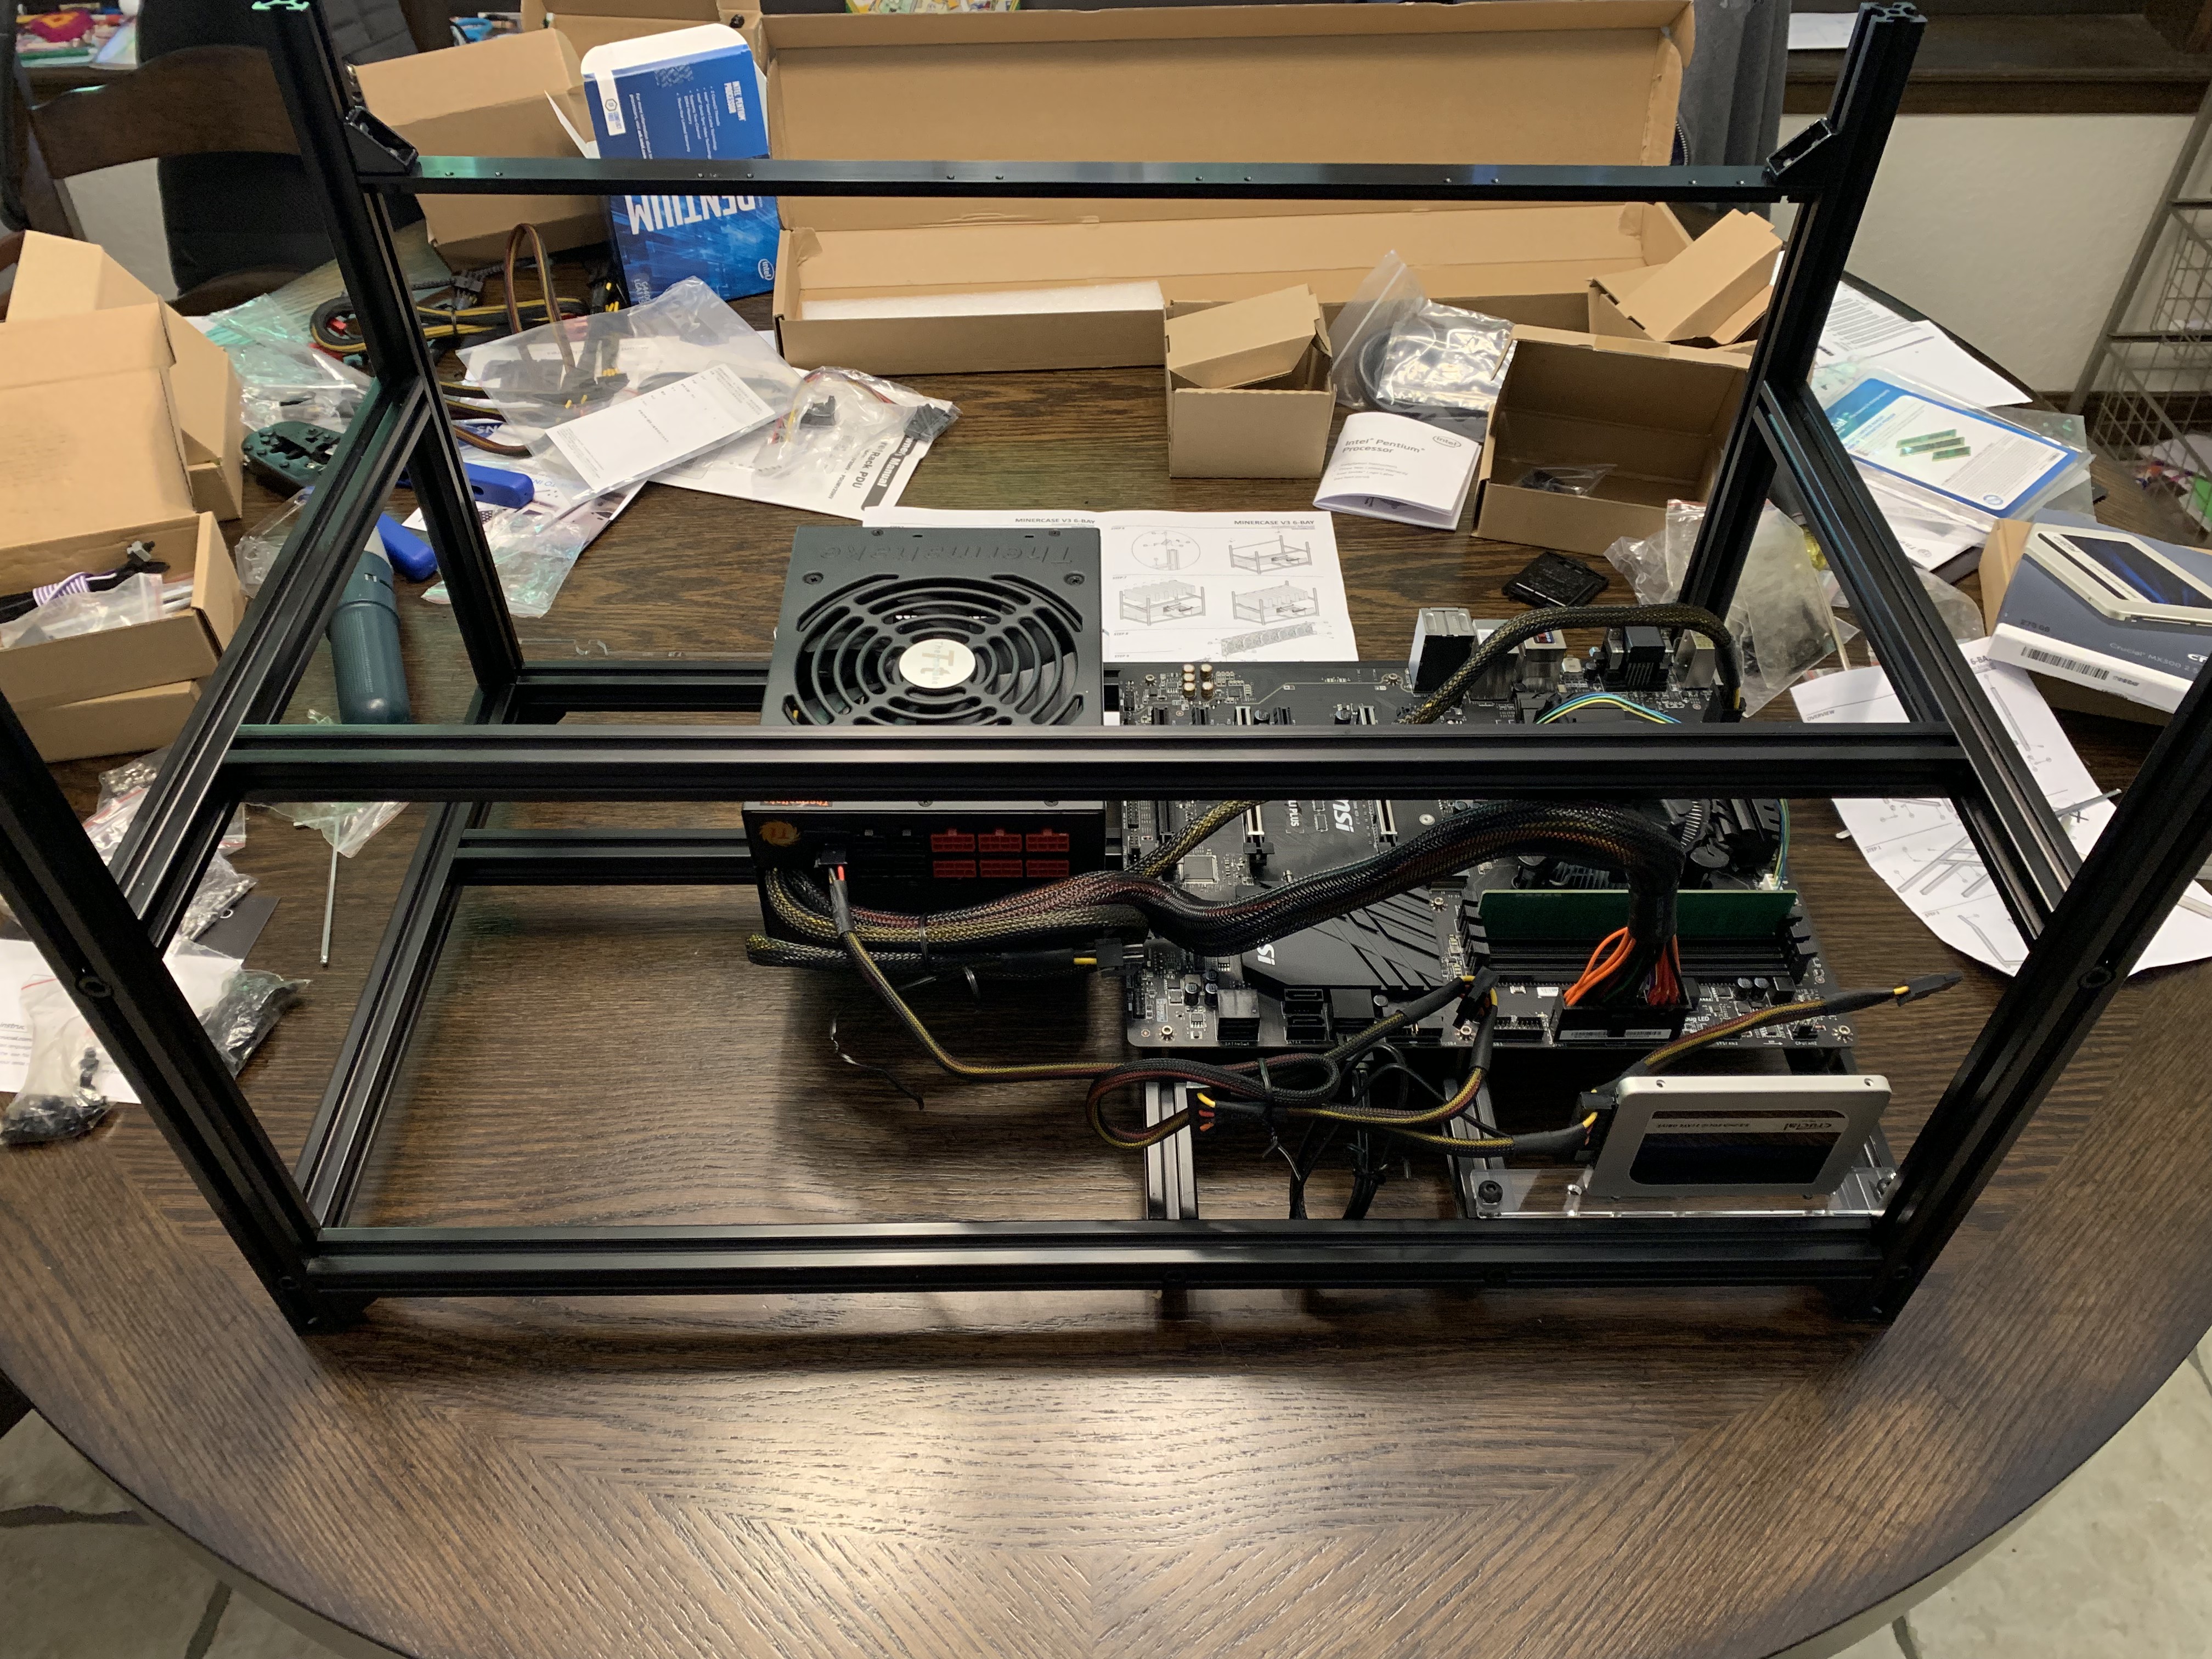
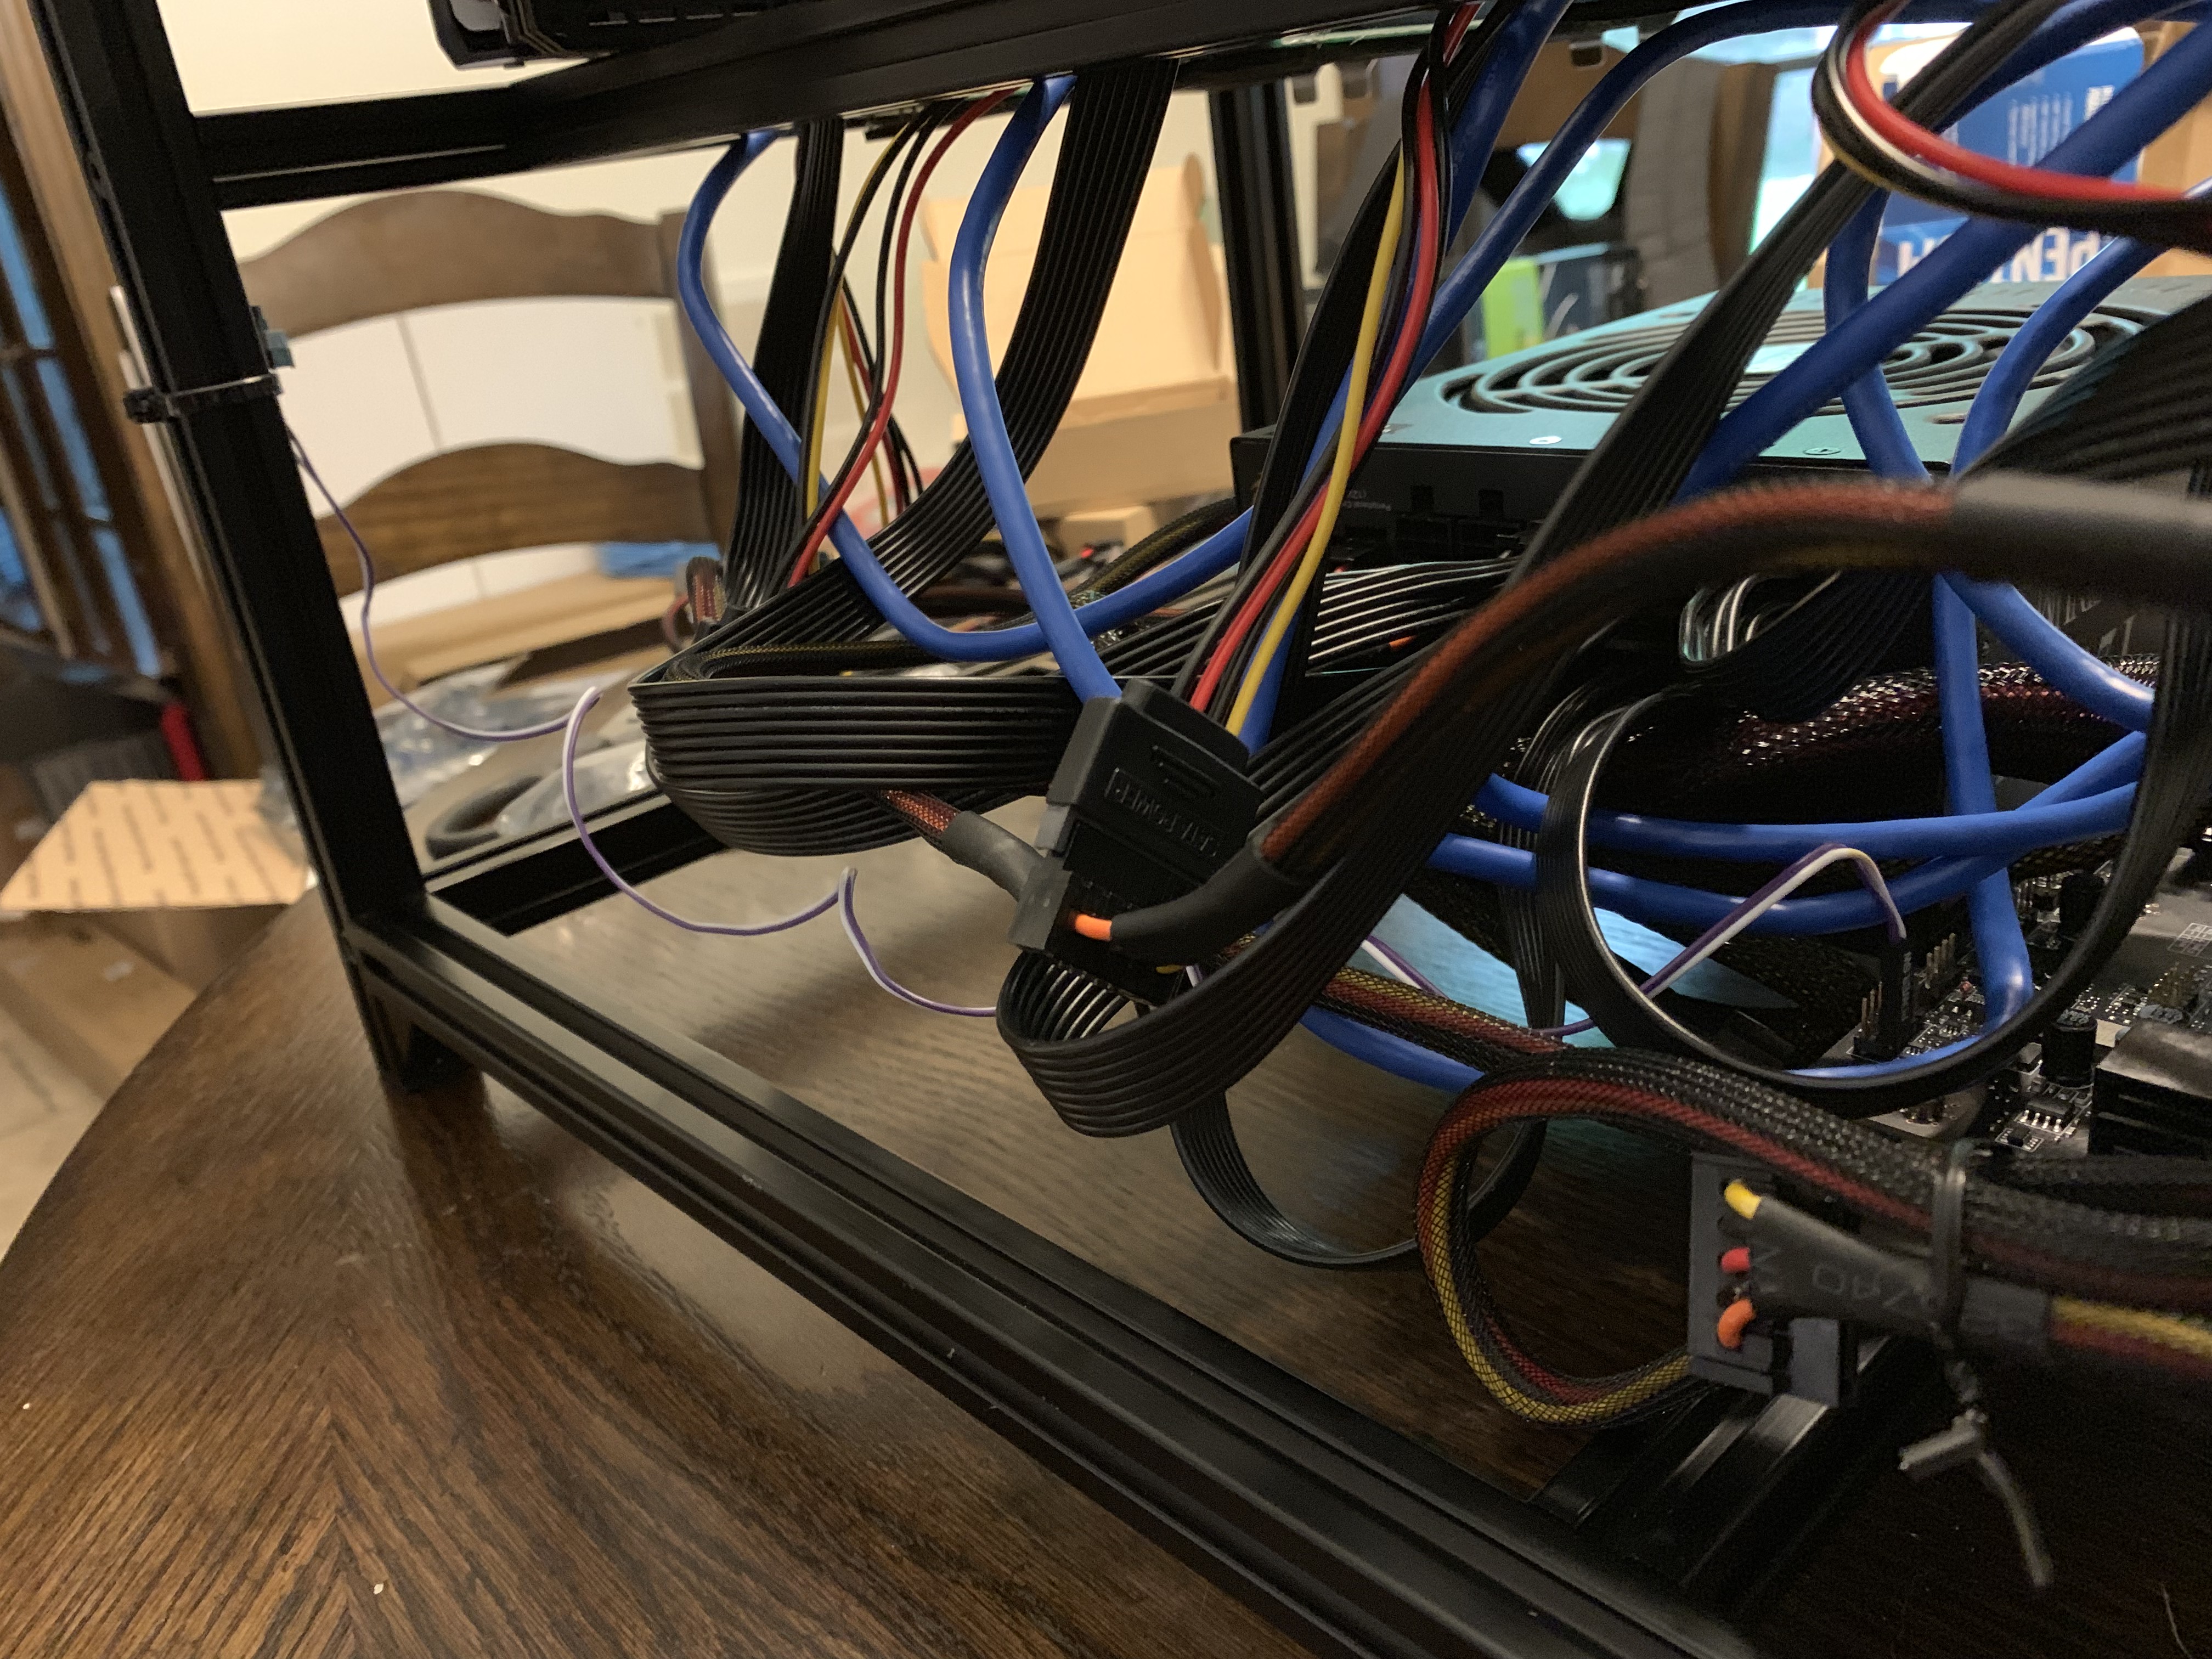
Now install the power supply. Connect the main board power and the auxiliary power connectors to the motherboard.
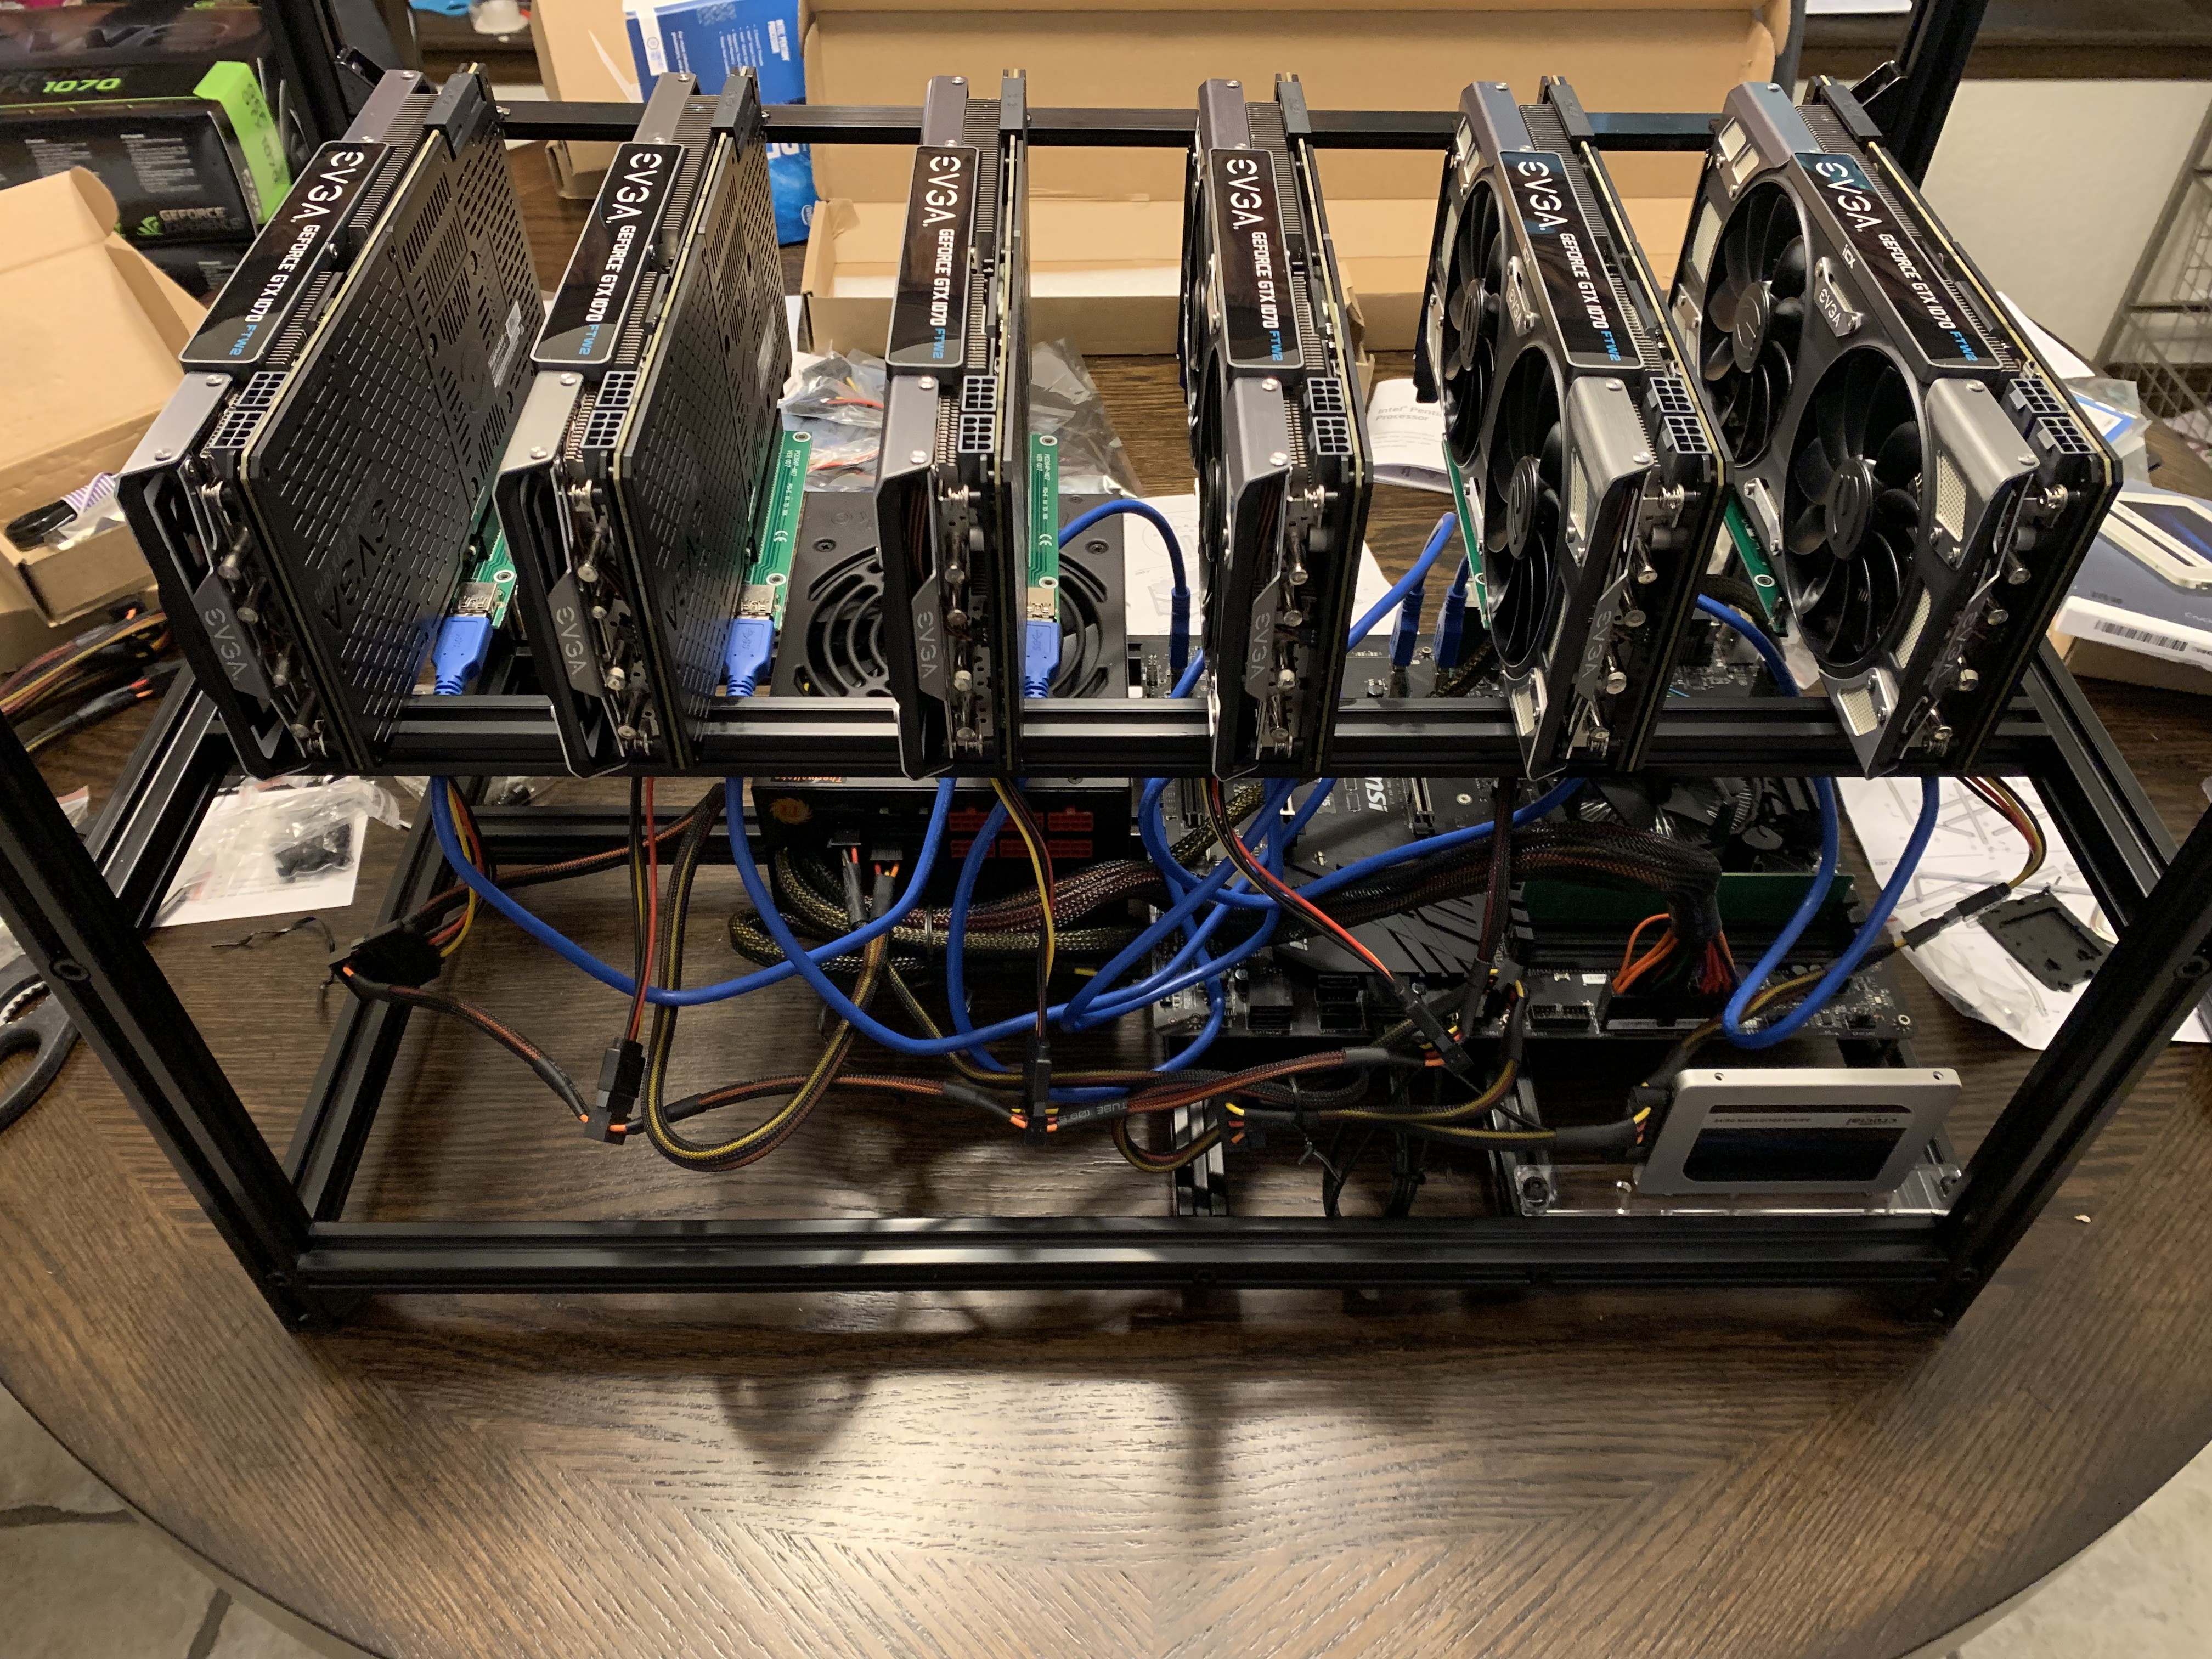
Next, install the graphics cards. First add the supports for the graphics cards to the frame, then screw each graphic card to the upper support with the underside of card resting on the lower support.
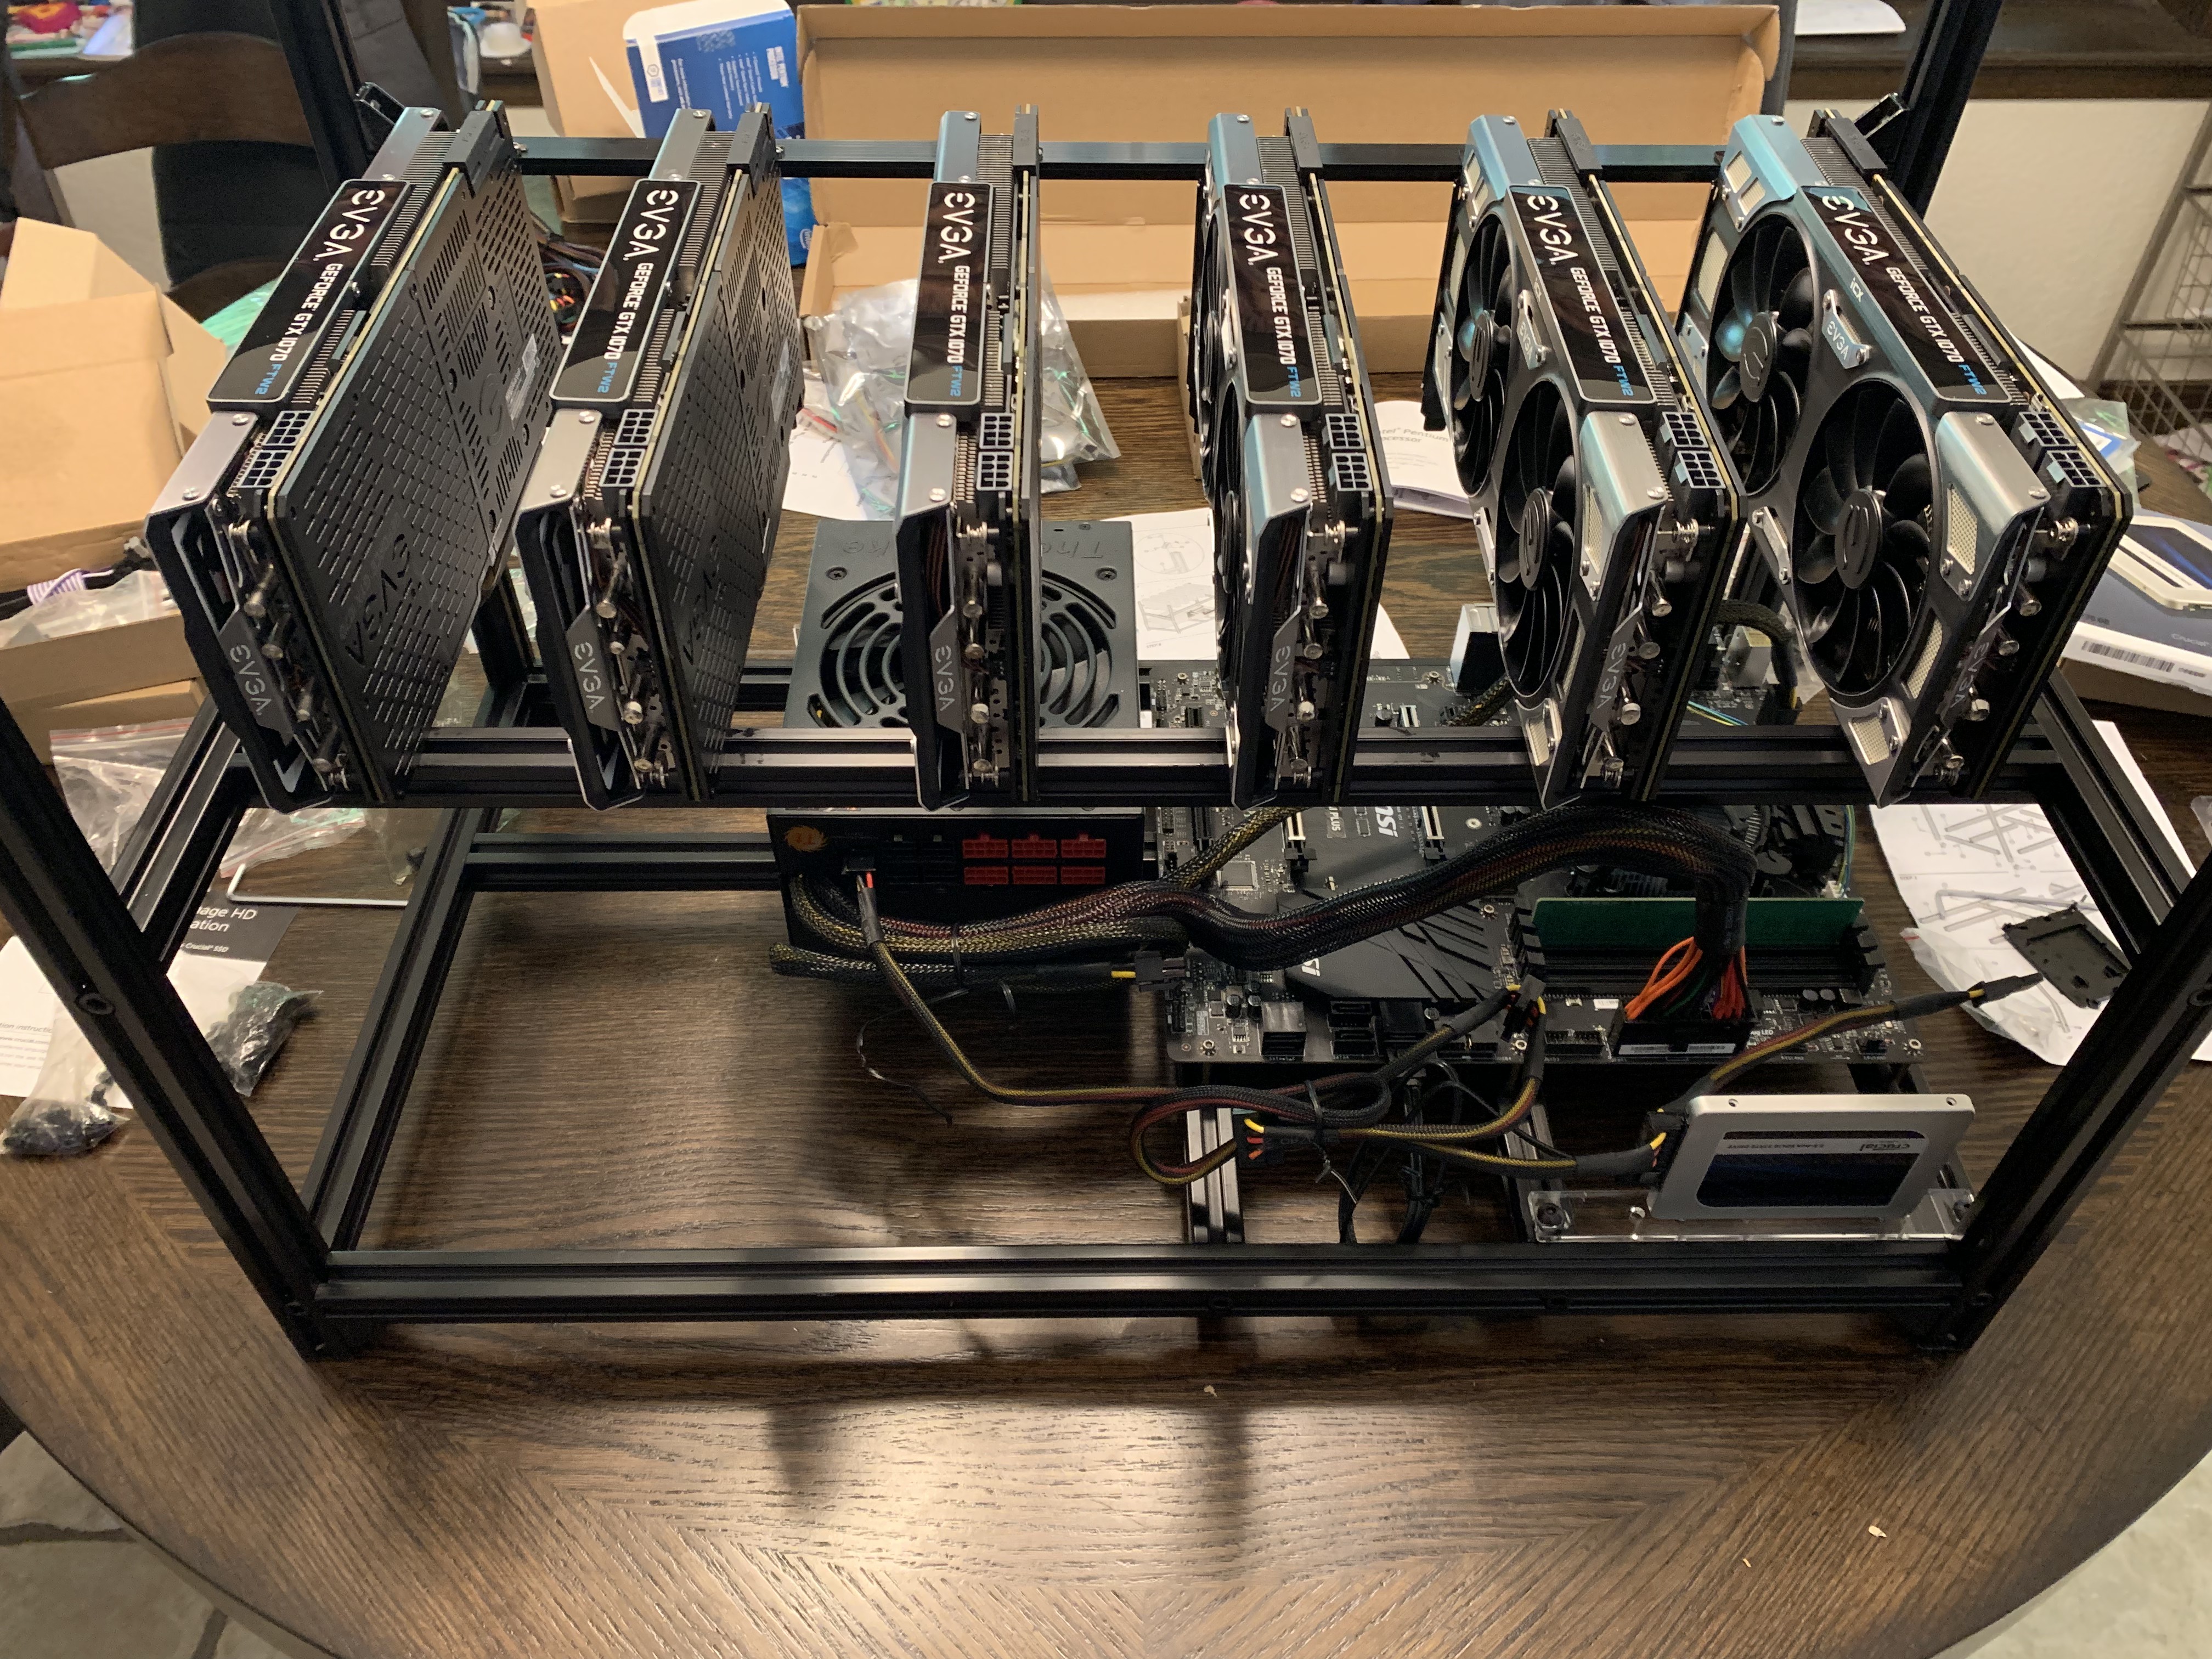
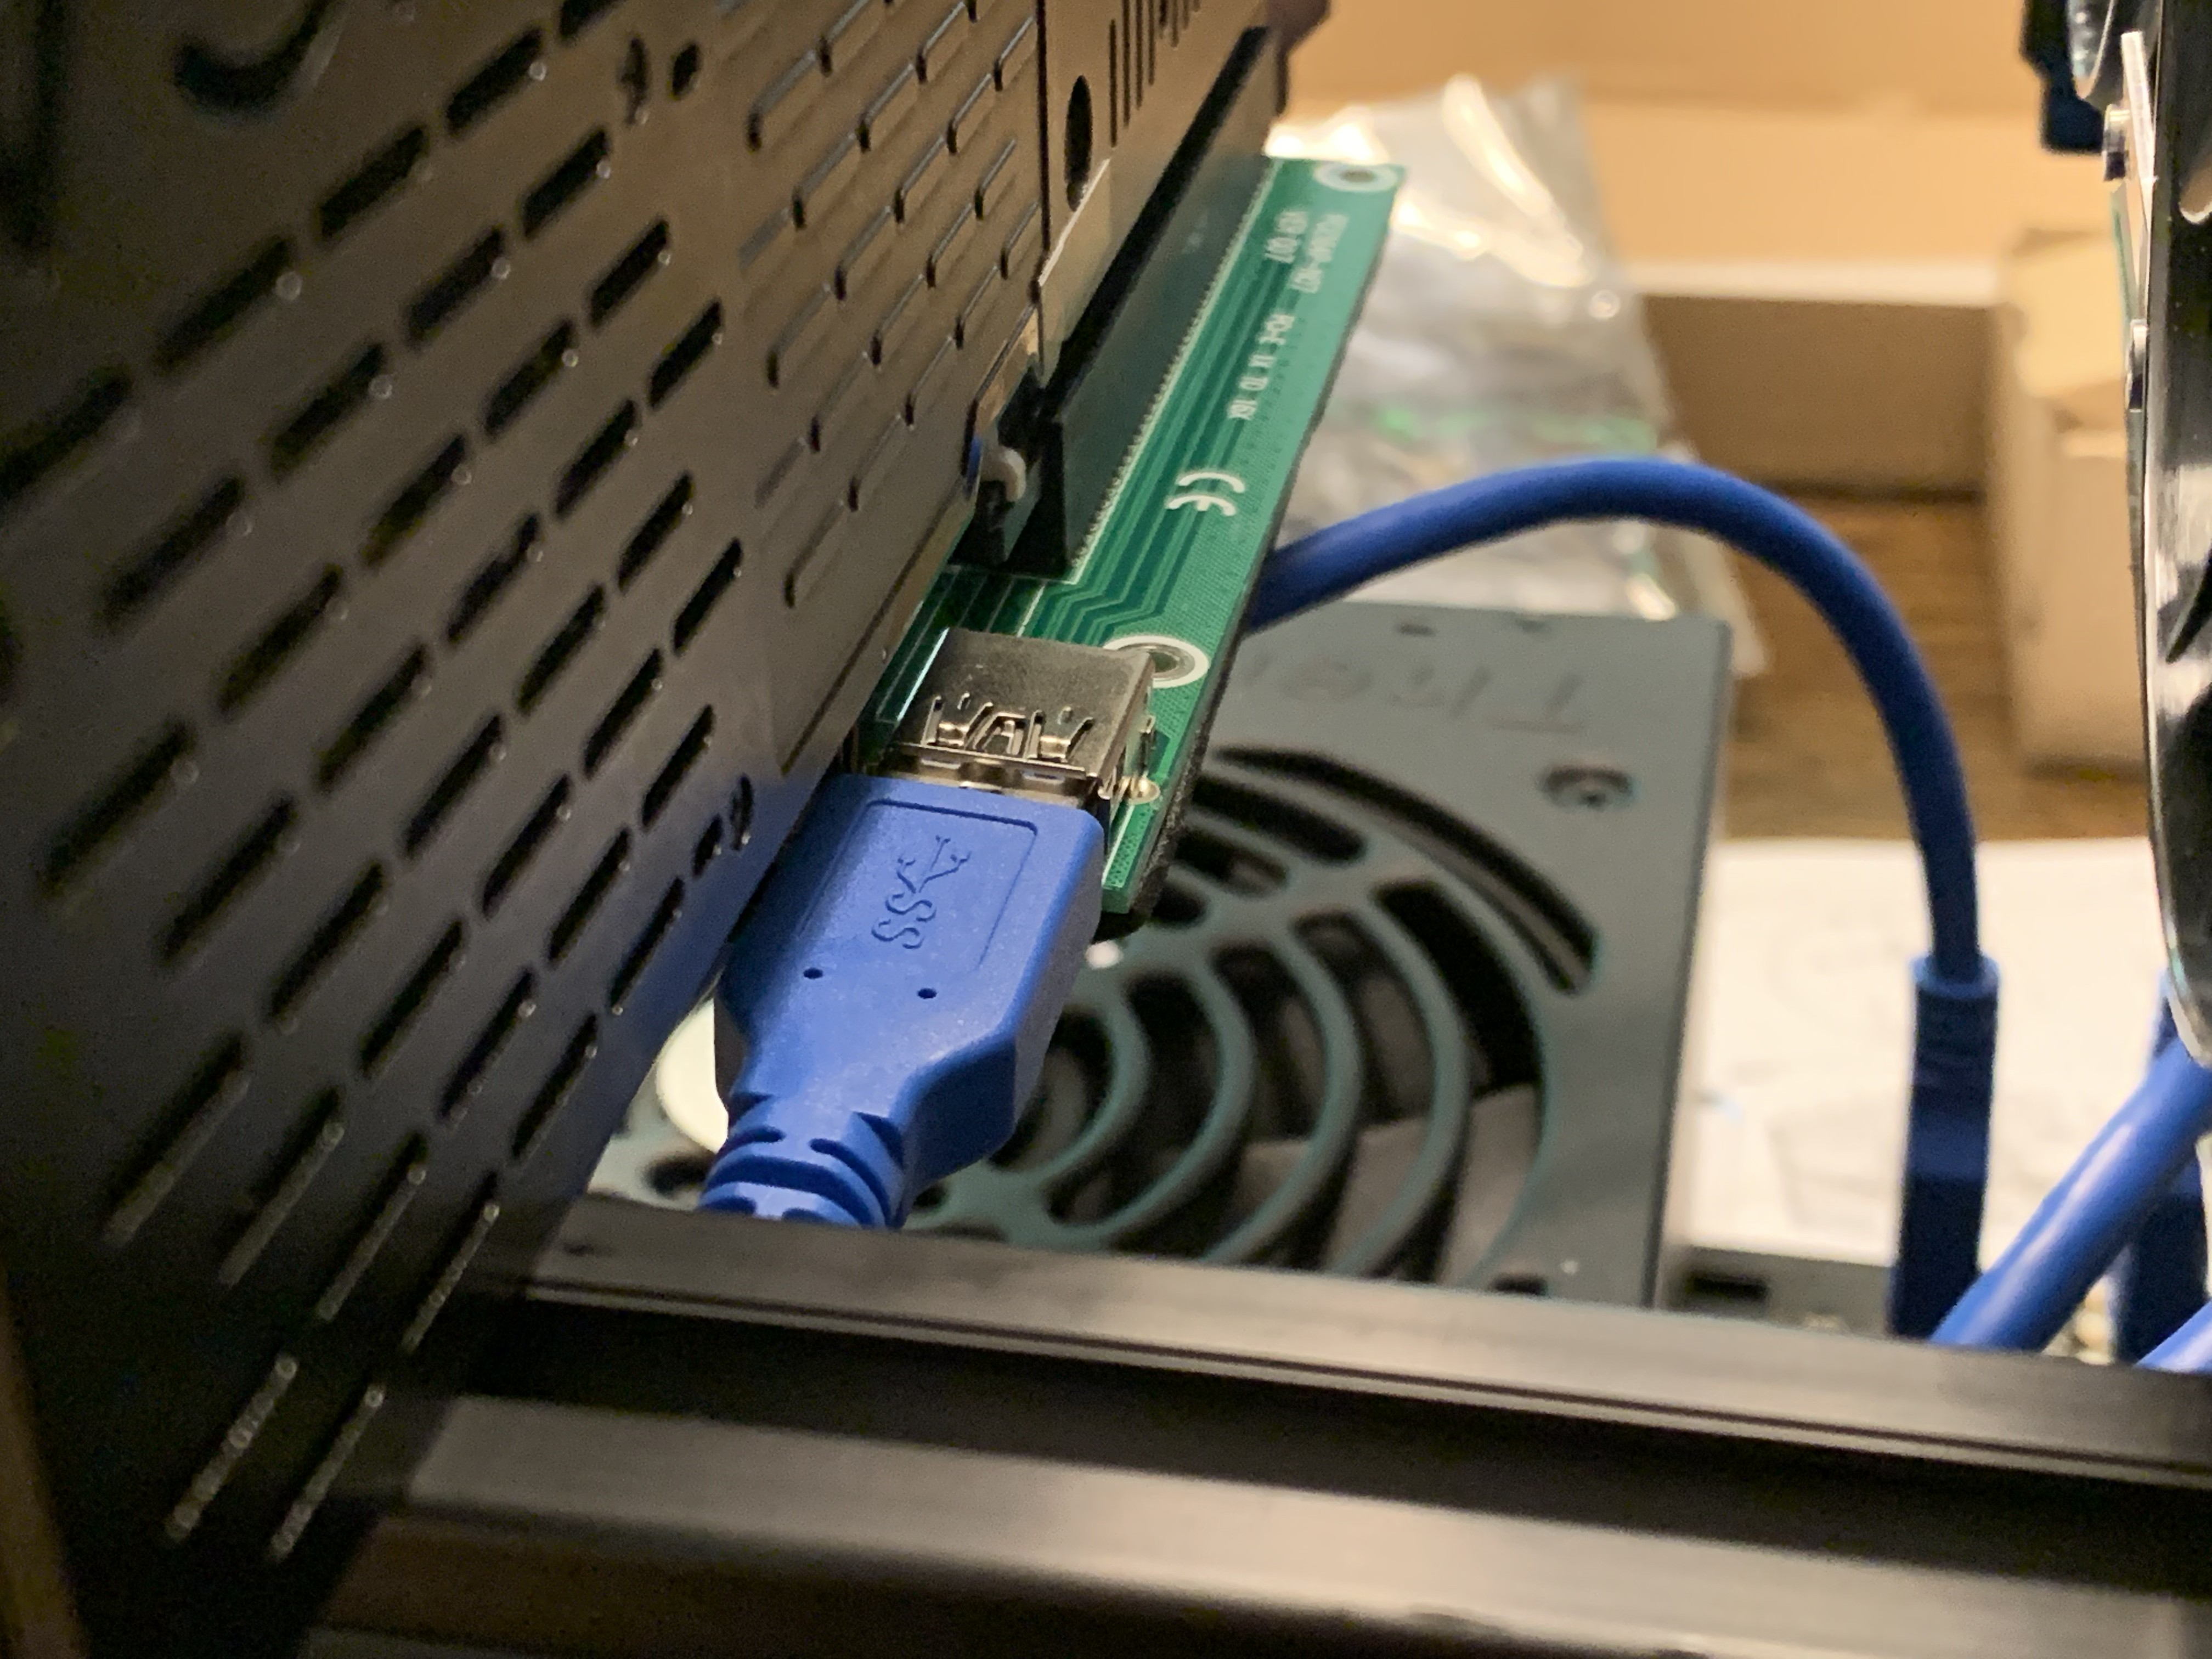
After the graphics cards are installed, attach a riser card to each graphics card PCIe connector.
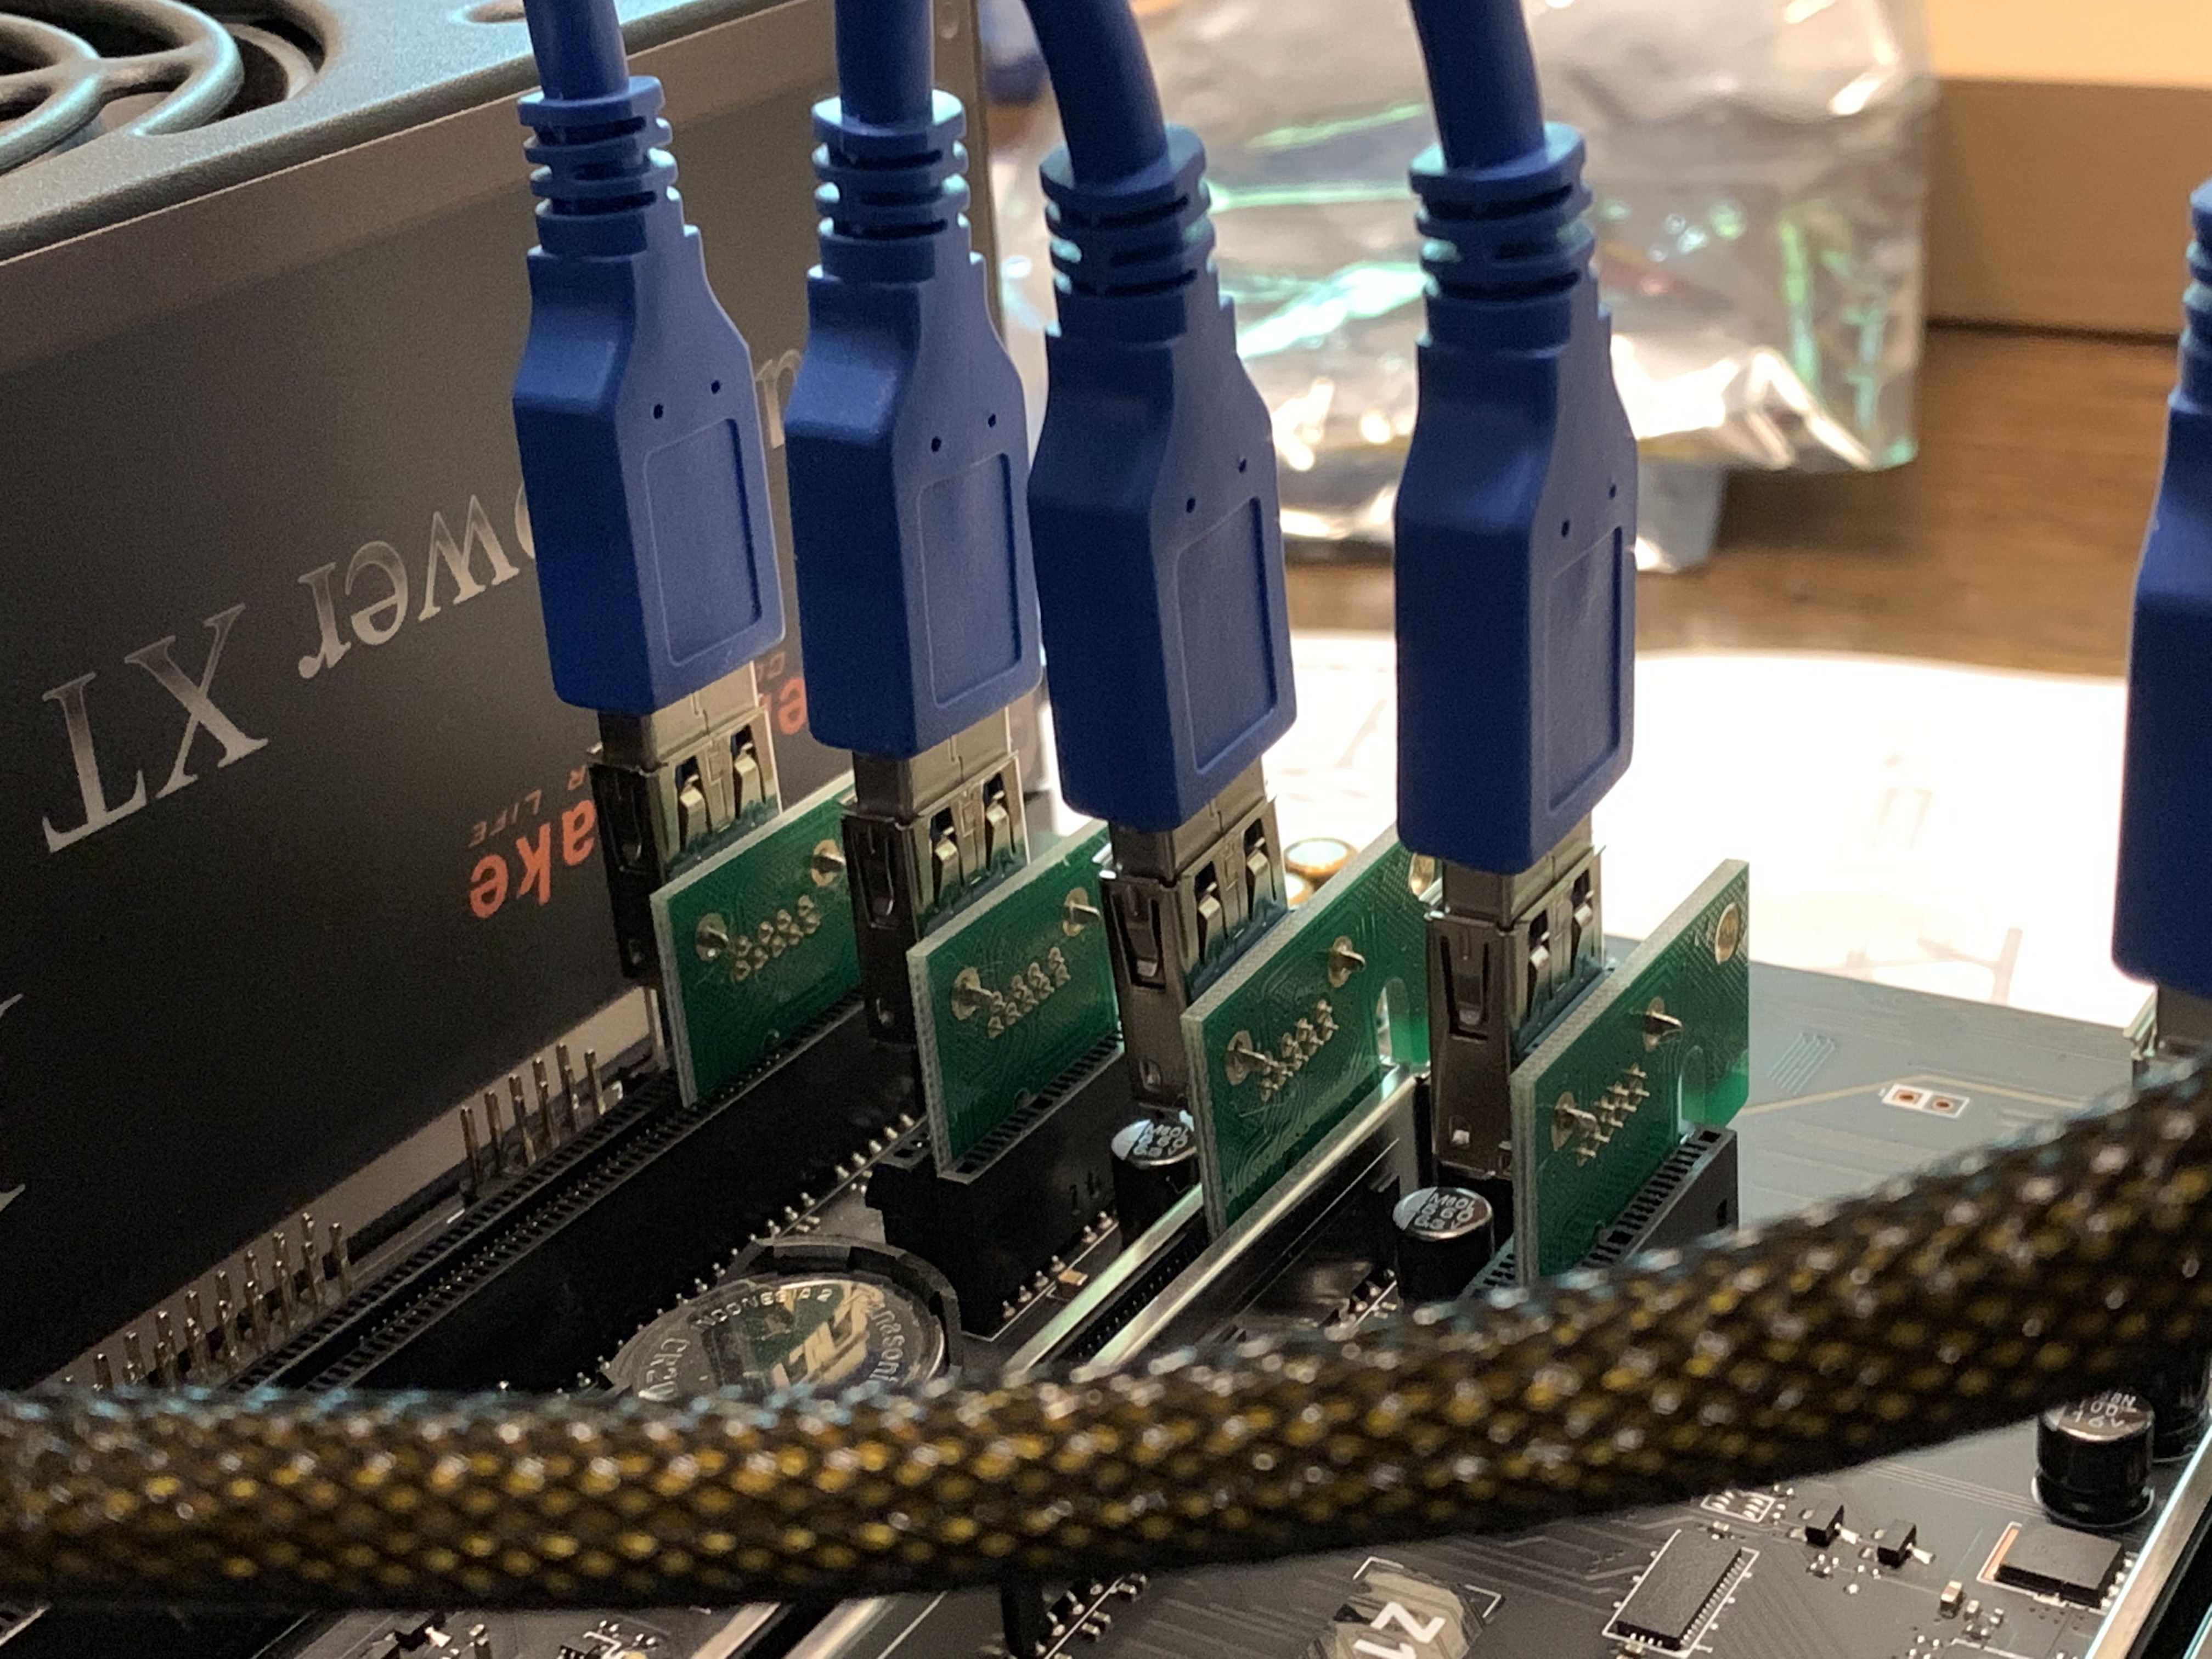
Then insert the daughter boards for the riser cards into the PCIe slots on the main board.
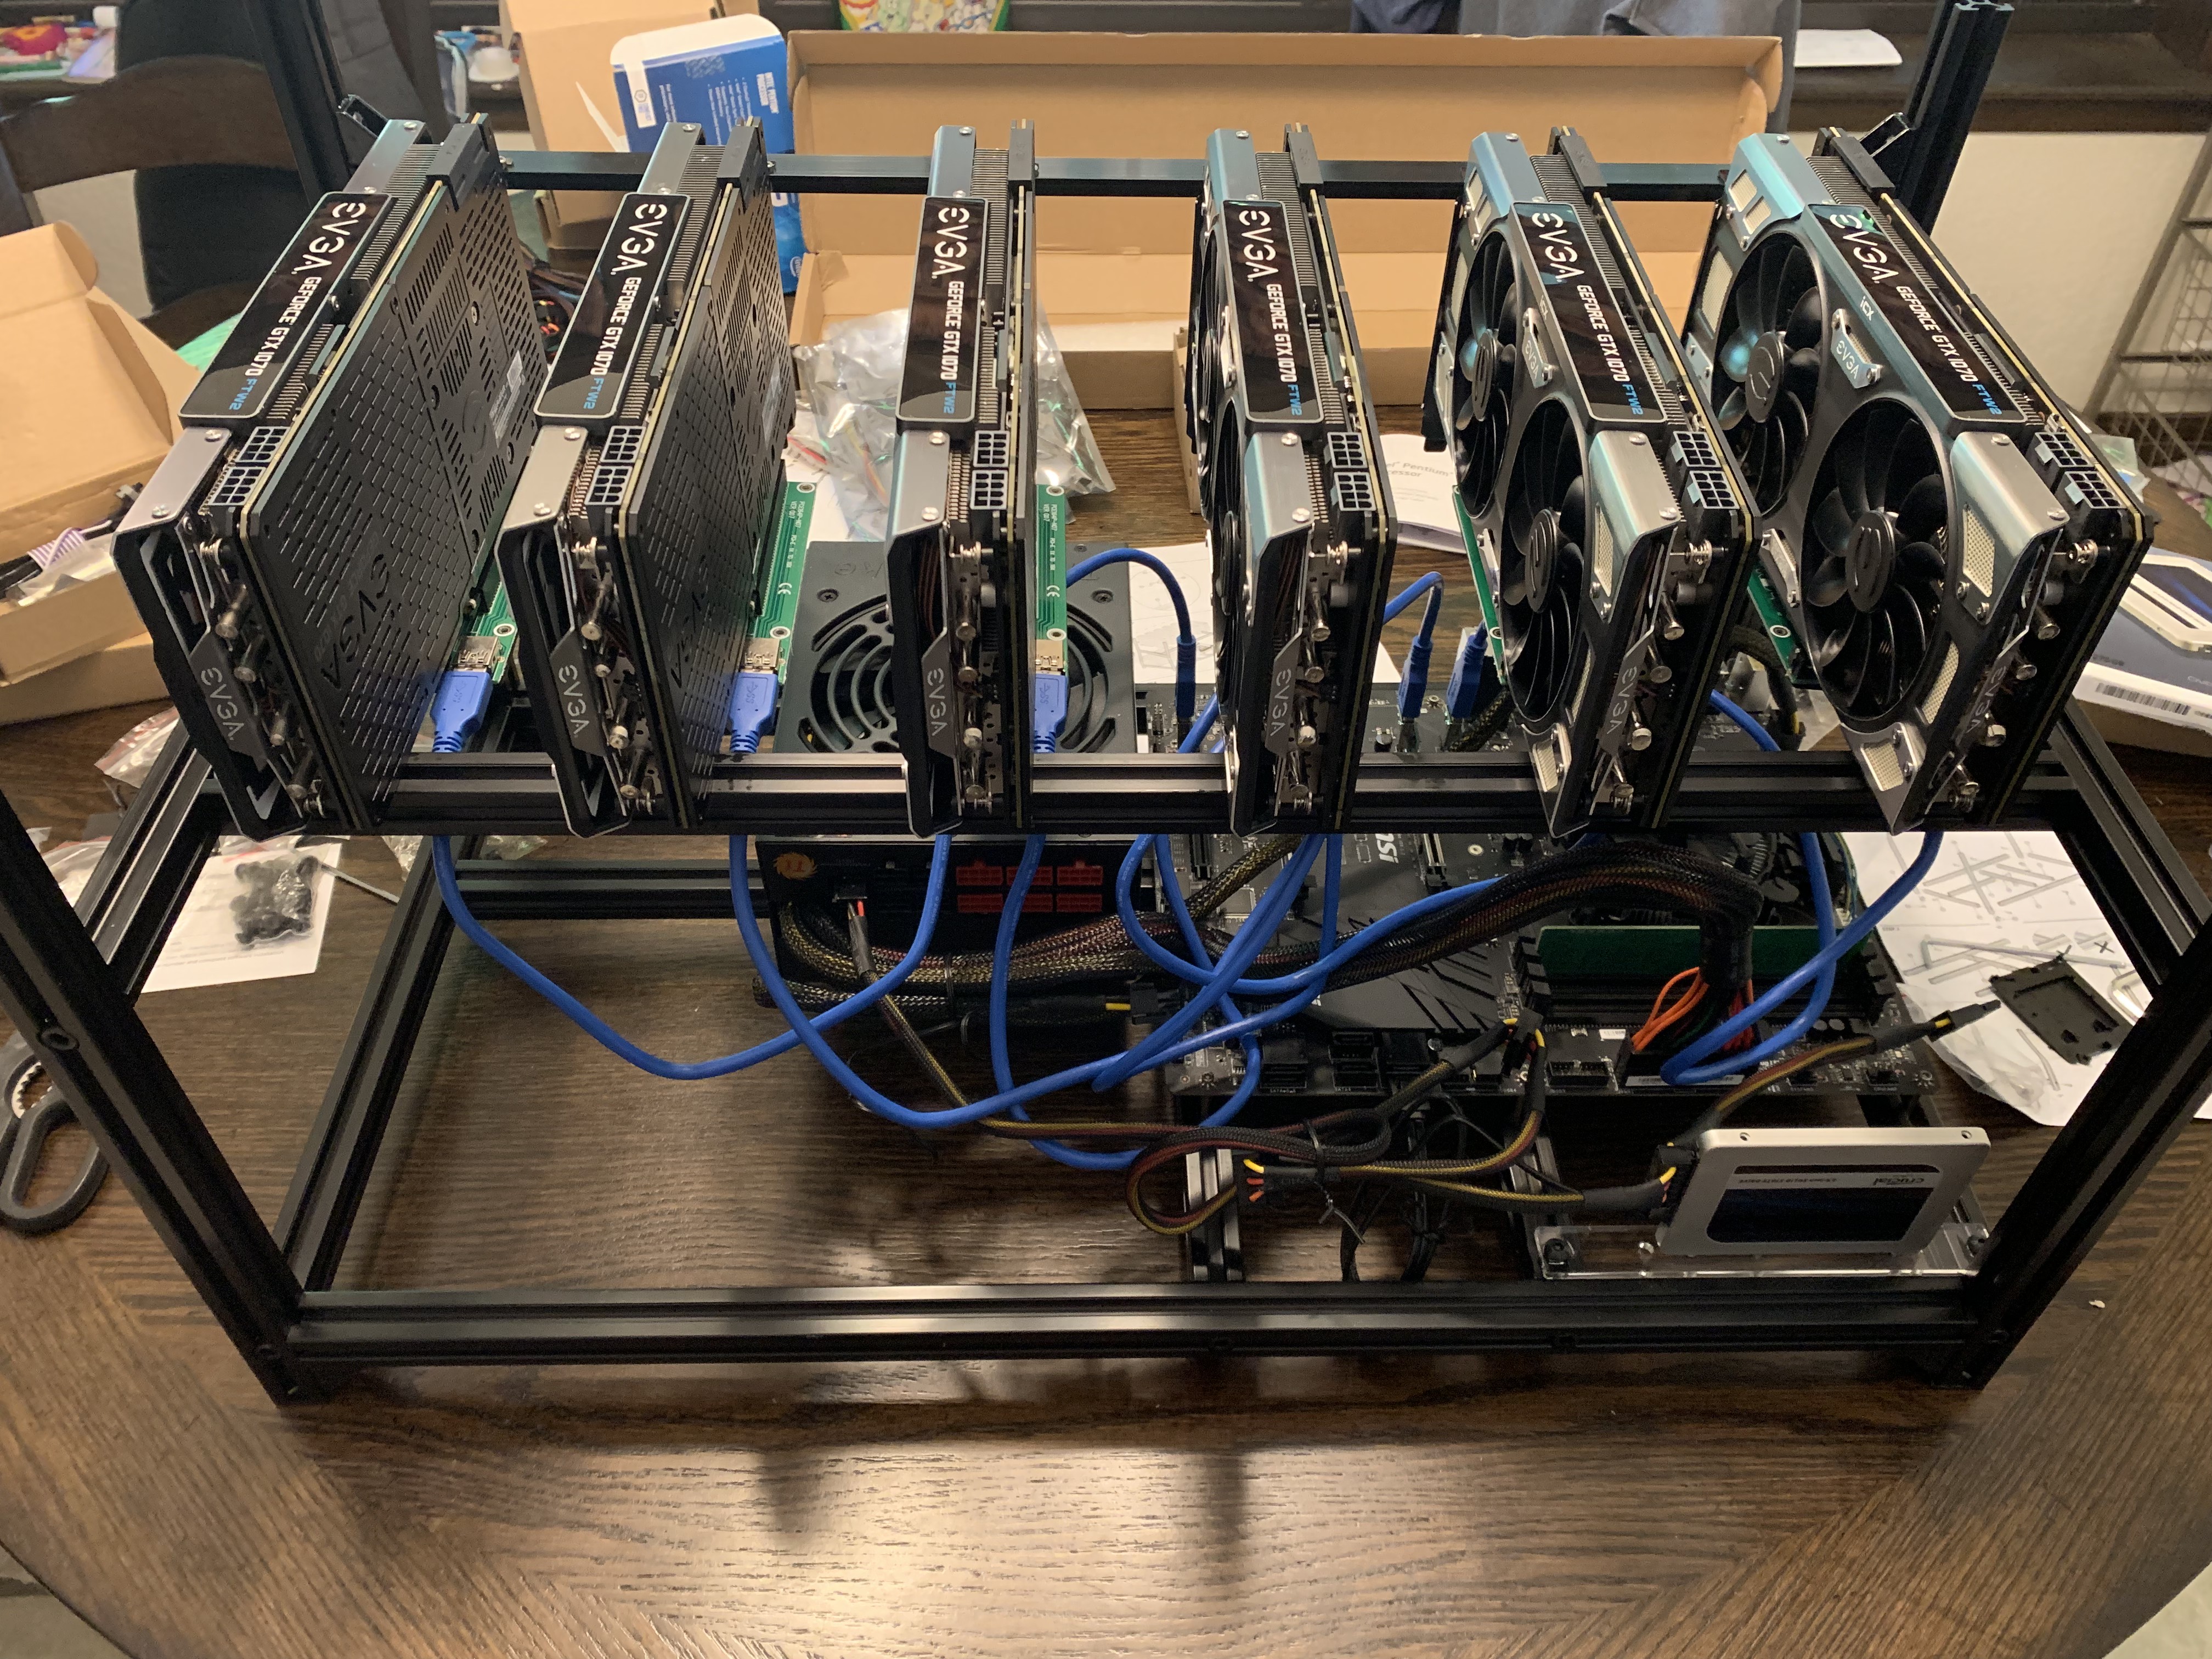
Finally, tie each riser card to its corresponding daughter board with a USB cable.
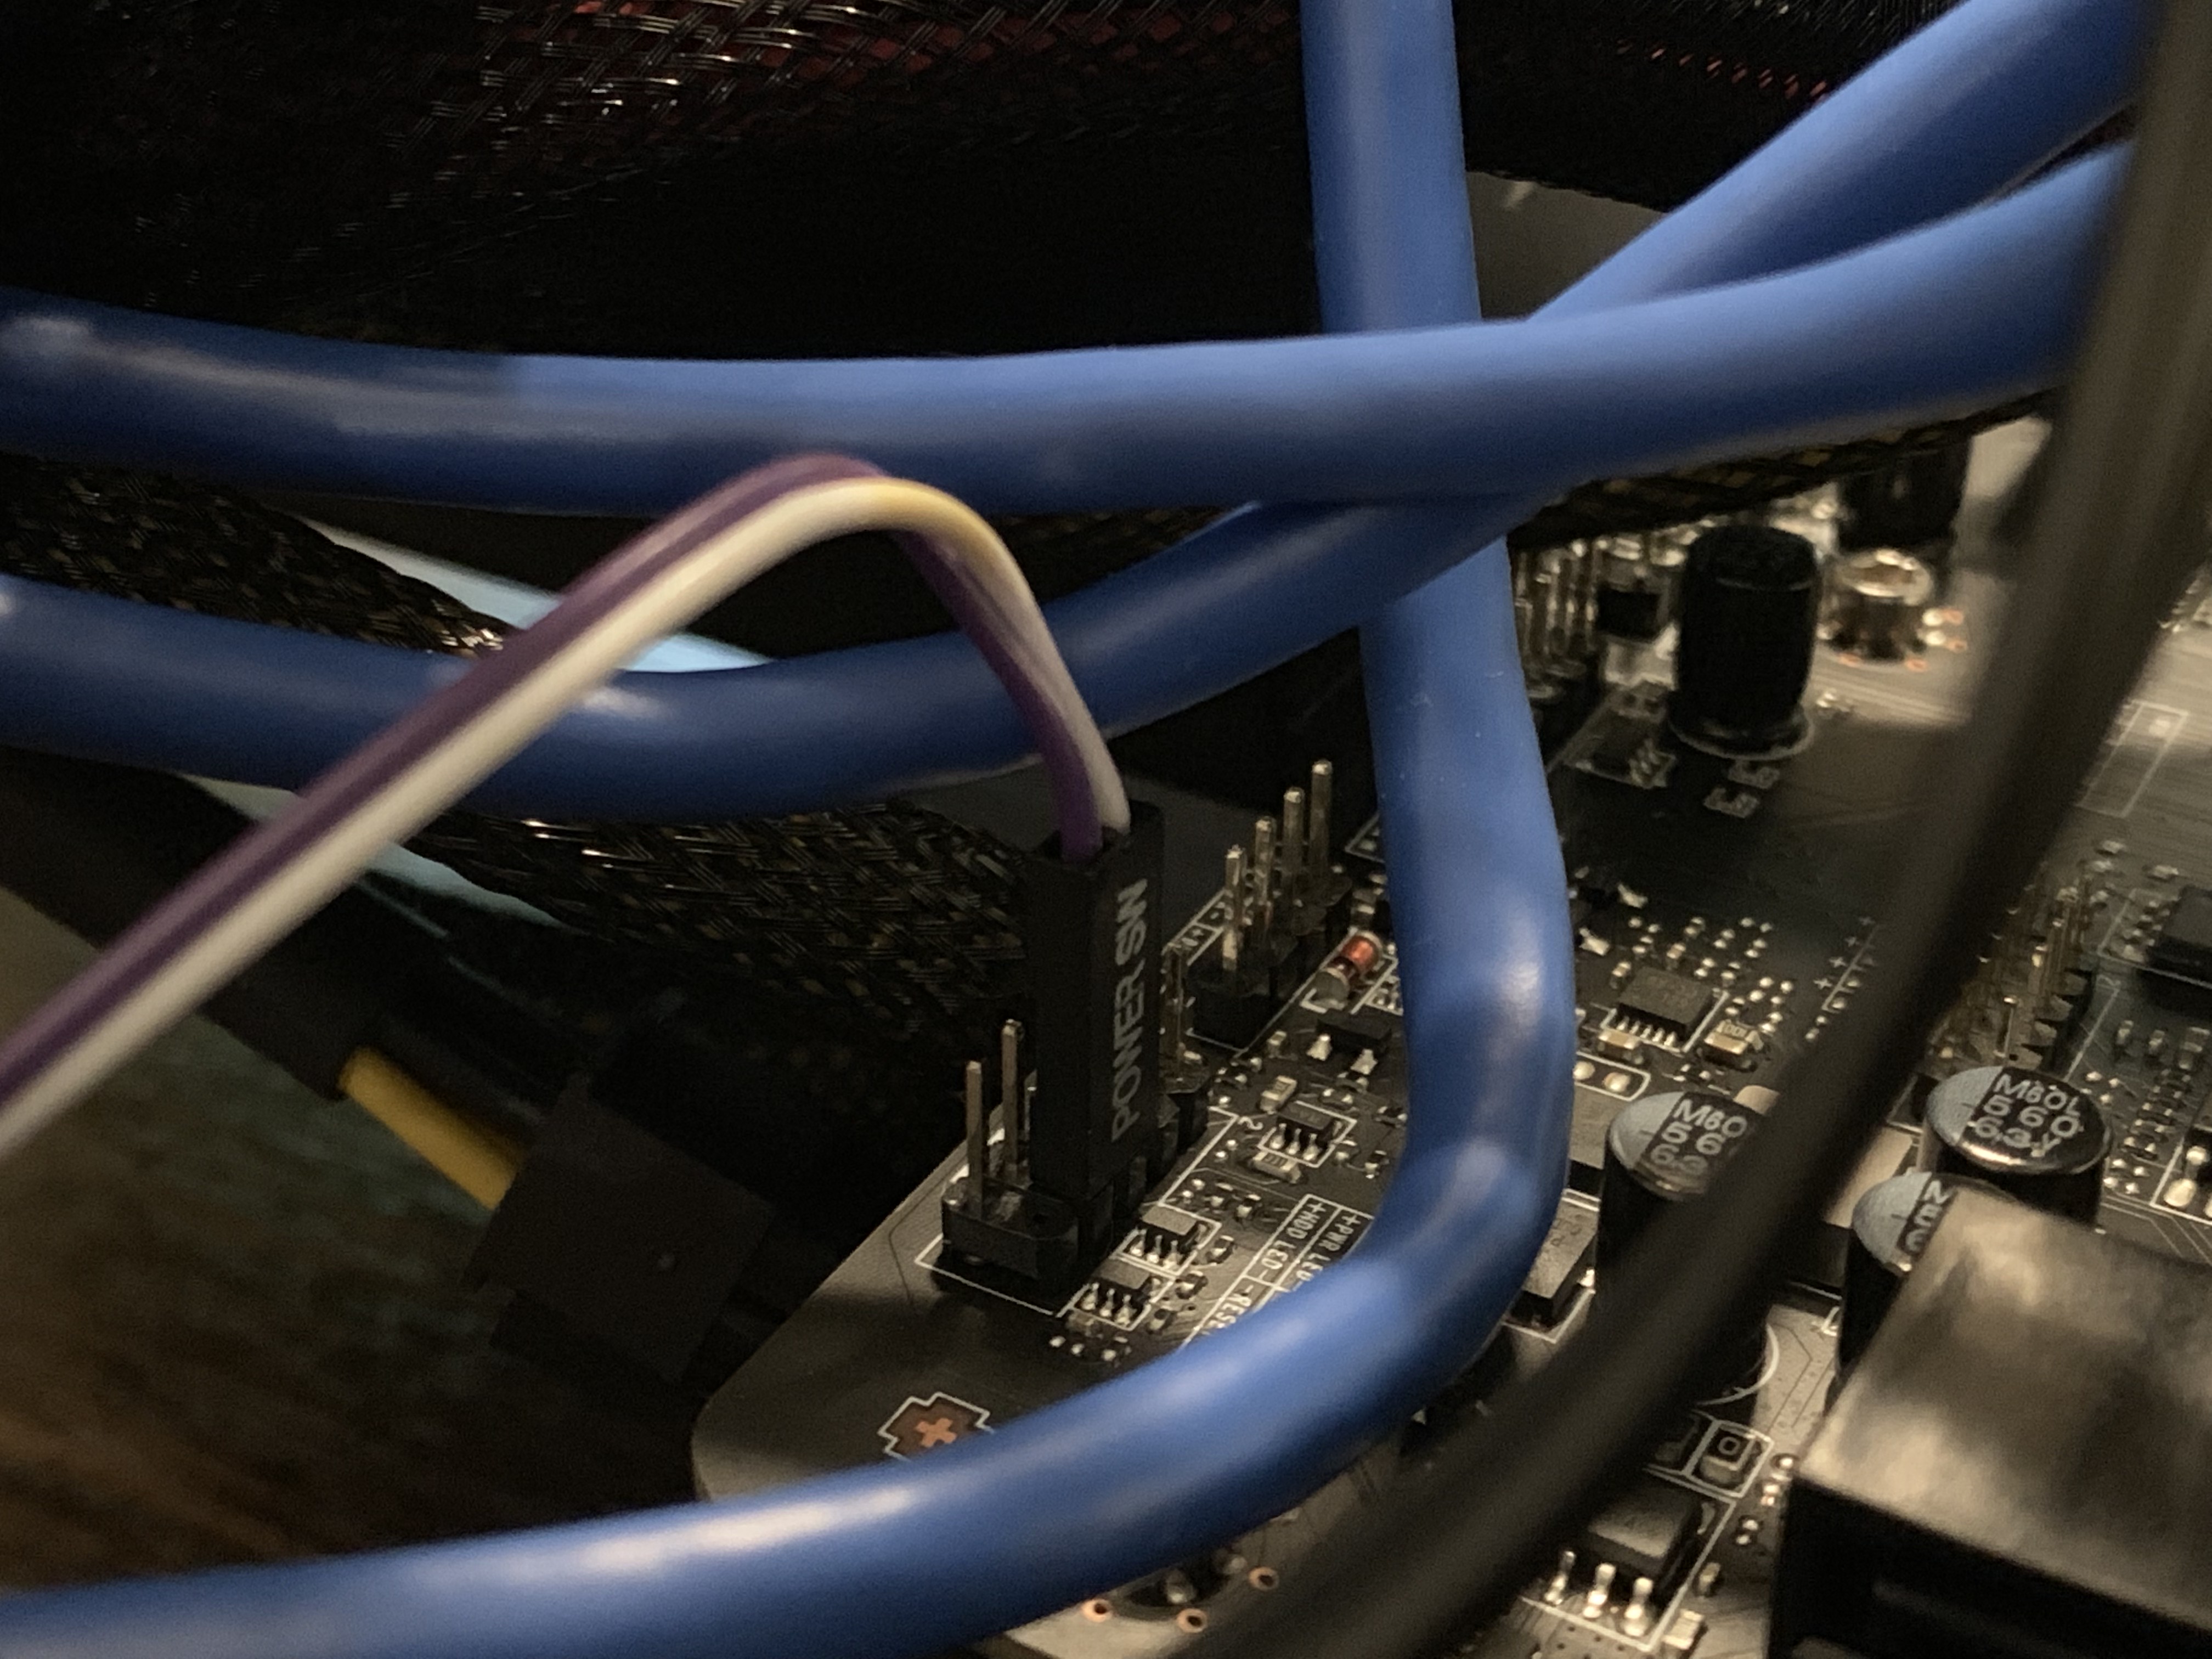
Attach the power switch to the system board. You can zip tie the power switch to the frame of the mining rig, so it does not hang loose.
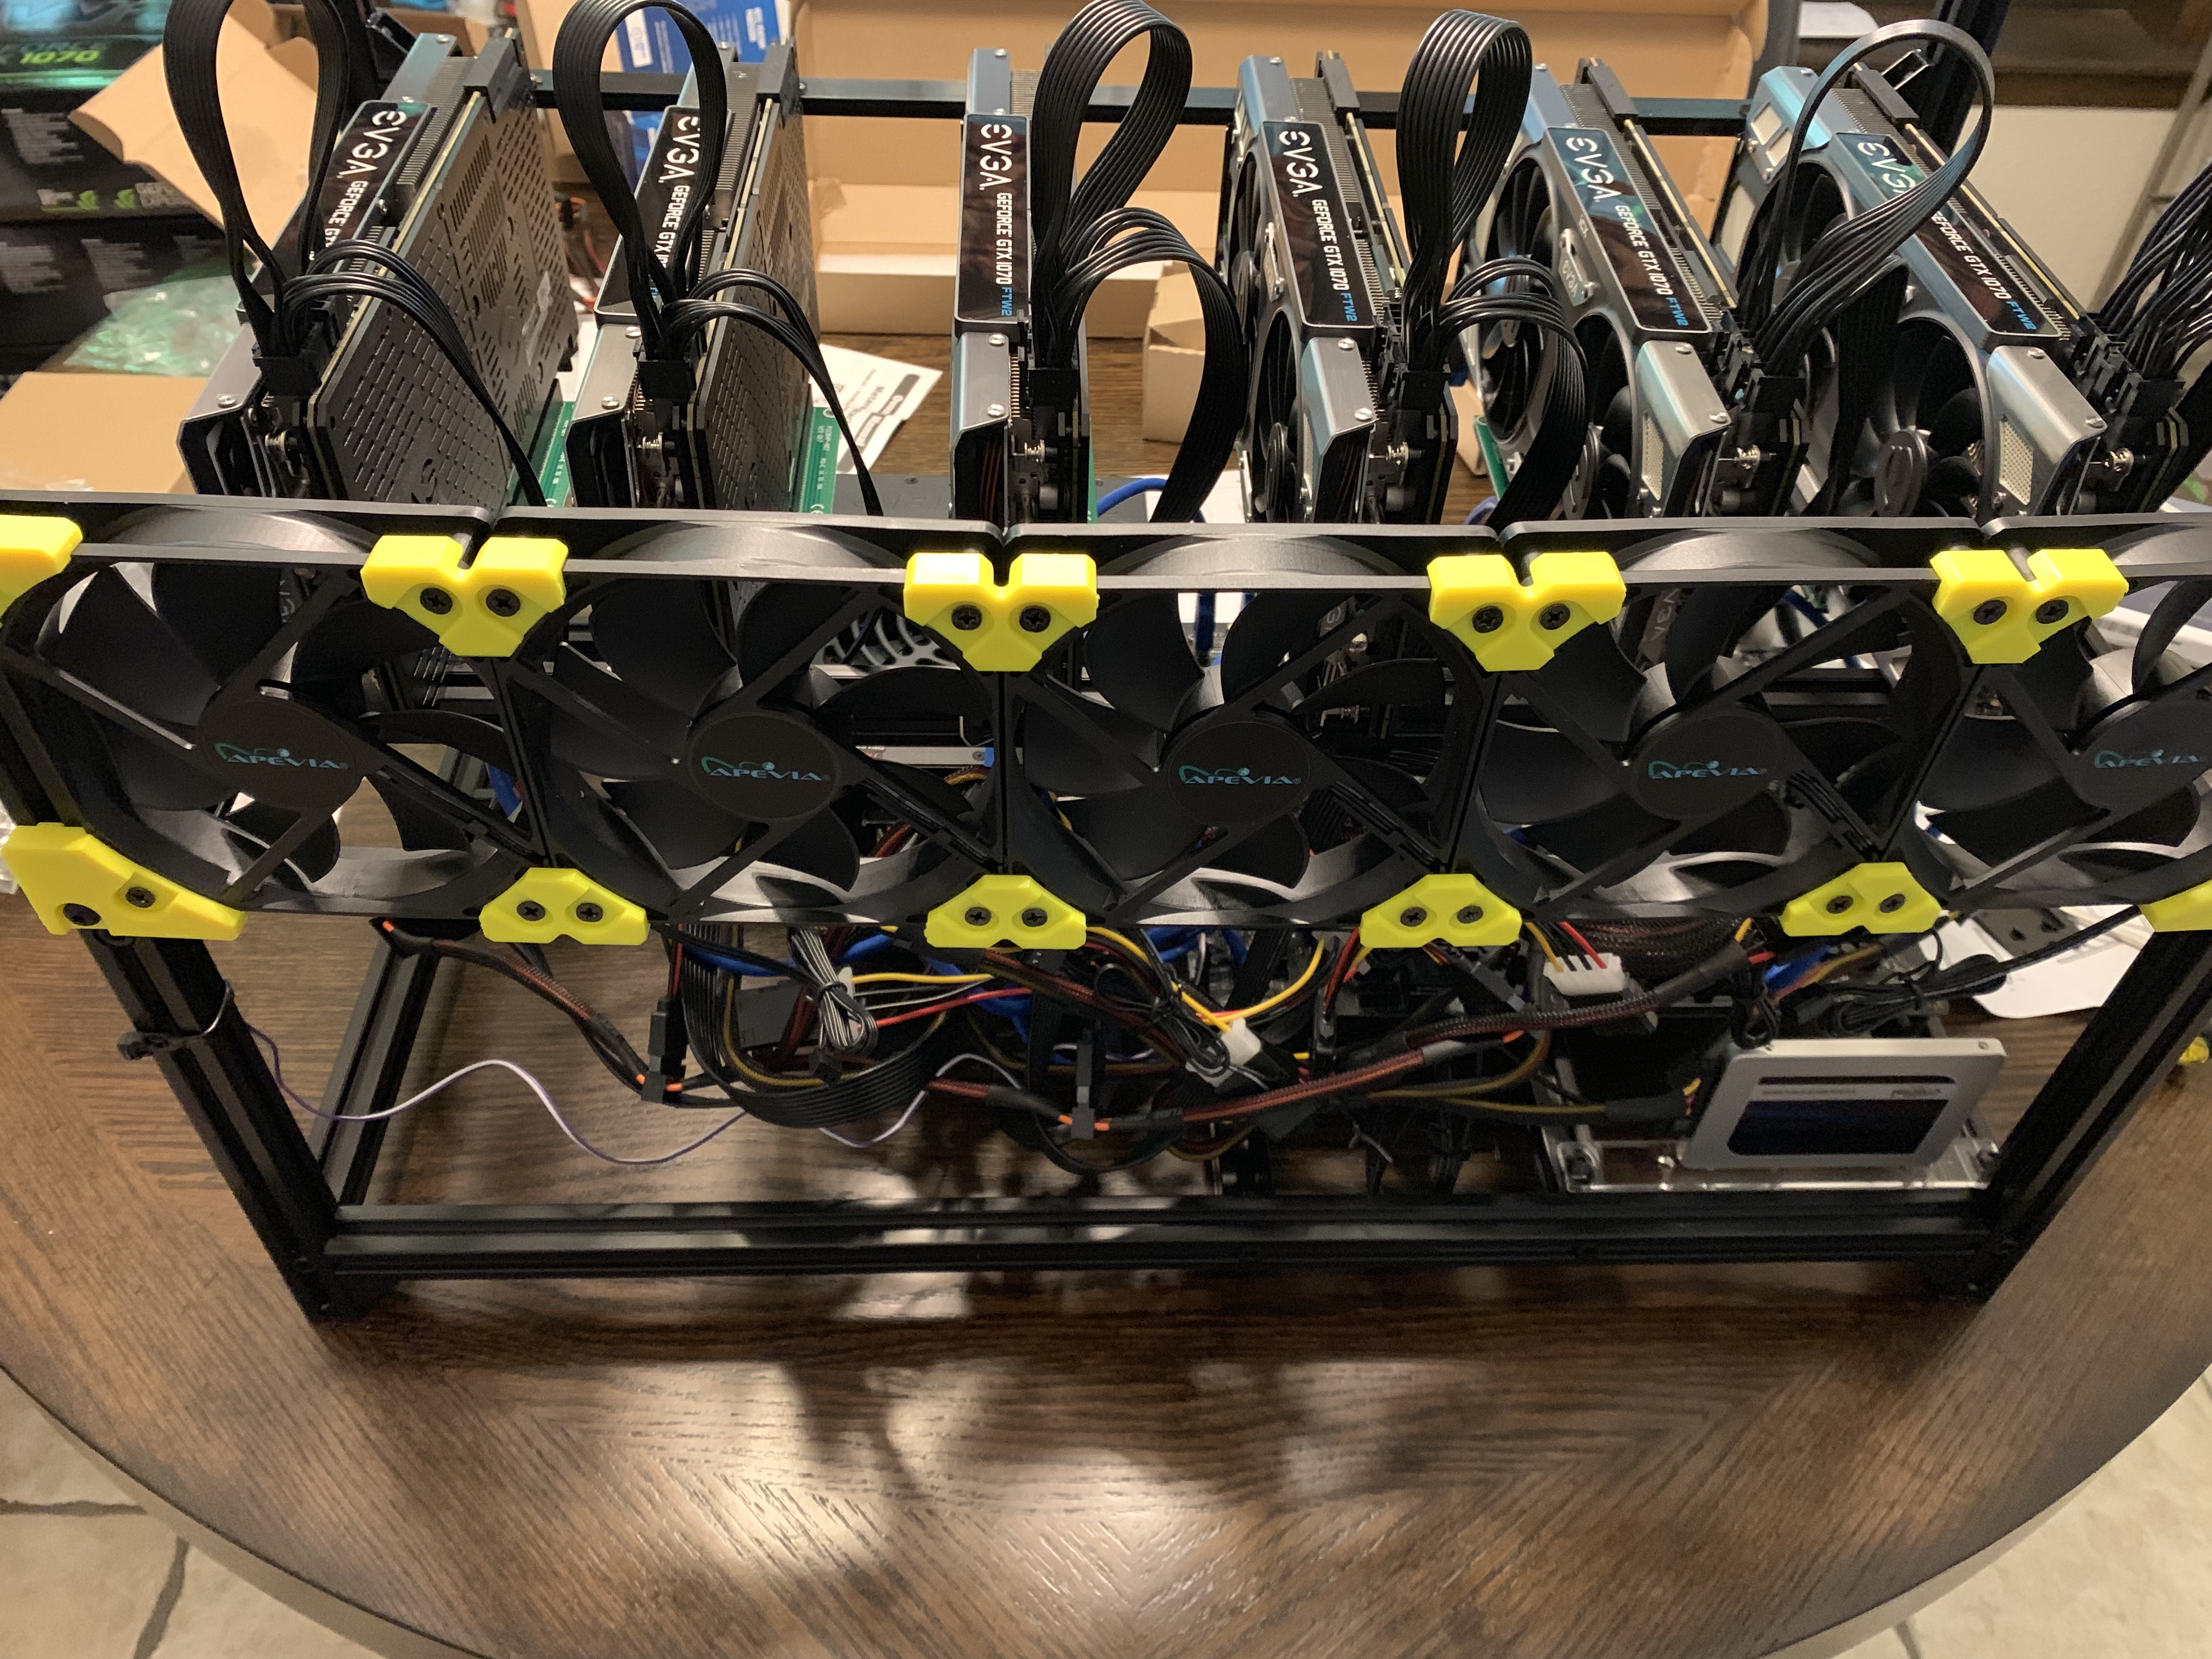
Now plug in the power to the riser cards, install the fans and plug in the power to the graphics cards themselves.
Installing the OS and software
Now that the rig assembly is completed it is time to install Ubuntu, the graphics driver and mining client software. For this you will need to attach the rig to a keyboard, mouse, and monitor. Note you will likely need to plug the display cable(typically DVI cable) into one of the graphics cards, as the system will default to displaying output to the primary card slot on the board. Check your motherboard manual to determine, which PCIe slot is designated as the primary graphics card slot.
Note, that some of the steps below are specific to using NVIDIA graphics cards. (e.g. anything related to disabling the open source nouveau driver or building the NVIDIA proprietary driver) If you are using AMD graphics cards, then these steps are not applicable to you and you may have additional steps you need to take.
OS installation steps:
- It is likely the BIOS of the motherboard is out of date. Make sure you have the latest version of the BIOS by powering on the machine and going into setup during the boot cycle. (Typically pressing F1 or Delete when the machine starts) Then compare the version number of your BIOS to the latest one listed on the manufacturer’s website.
- If you need to update the BIOS, download the latest version from the motherboard manufacturer’s website and flash the motherboard via USB stick. Reboot the machine.
- If the BIOS software of your motherboard supports it, use the builtin utility (e.g. “Board Explorer utility”) to check that all PCIe cards are reporting present in the BIOS. If not all are present, check for loose connections and ensure all cards have power.
- If your motherboard has an integrated graphics card, you can drive the display of the system from the integrated graphics port. You should be able to designate this within the BIOS. (e.g. For the motherboard provided in the parts list above, you would select the Integrated Graphics Card to boot by going to Settings > Advanced > Integrated Graphics Configuration and changing “Initiate Graphic Adapter” from PEG to IGD)
- Next your motherboard may require you to activate a setting to support driving graphics cards from all available PCIe slots. (e.g. For the motherboard provided in the parts list above, you would need to turn on the Crypto currency mining setting labelled “Above 4G memory”, to allow the PCI bus to support more graphics cards by going to Settings > Advanced > PCI Subsystem Settings) Save & Exit.
- Turn off the computer using the manual power button once the display resets during the reboot sequence. (If we let it just reboot it will error, since the video output is coming from one of the GPUs instead of the onboard graphics card)
- Move the cable from the GPU to the onboard (integrated) graphics port.
- Turn on the computer
- At bootup, edit the grub configuration and disable noveau driver by adding “nouveau.modeset=0” to the end of the “linux line”. (Typically right after the word quiet). Something like the following…
linux /boot/vmlinuz-4.15.0-55-generic.efi.signed root=UUID=7c357f9a-3c61-47e7-946e-499e8ea8ad1c ro quiet splash nouveau.modeset=0
This will prevent the default nouveau driver from loading and potentially causing the boot sequence of the ubuntu installation to error. 10. Once, booted proceed with the installation of Ubuntu Server LTS. If you are unfamiliar with this process please refer to the official instructions. 11. Remove the USB stick and reboot 12. Disable the nouveau driver by editing the grub configuration and adding “nouveau.modeset=0” to the end of the linux line just as you did previously. 13. After the system boots, verify that the graphics cards are present
lspci | grep -i vga
If all are not present (e.g only 5 of 6 cards are present) try the following:
- Ensure power connections to riser cards are plugged in
- Try turning off the power to different riser cards or sections of riser cards to isolate the problem
- Try swapping the “PCI express to riser card” USB connections to isolate the problem
- Once problem riser card is identified, try replacing it
- In order to use the latest NVIDIA driver we need to compile the driver against our current version of the kernel using the same GCC version as the kernel. (If we don’t do this the driver may potentially not work correctly or fail to load entirely) To do this, first install the C and C++ compiler and make, so we can build a specific version of GCC.
sudo apt install gcc g++ make
- Get GCC 7.4(version used for latest LTS server kernel of Ubuntu) and extract it
cd /opt
sudo wget https://ftp.gnu.org/gnu/gcc/gcc-7.4.0/gcc-7.4.0.tar.xz
sudo tar xJf gcc-7.4.0.tar.xz
- Build and install GCC 7.4
sudo su -
cd /opt/gcc-7.4.0
./contrib/download_prerequisites
mkdir build
cd build && ../configure --disable-multilib --enable-checking=release
make -j2 && make install
- Uncomment deb-src urls from /etc/apt/source.list
deb-src http://archive.ubuntu.com/ubuntu bionic main restricted
deb-src http://archive.ubuntu.com/ubuntu bionic-updates main restricted
- Update and upgrade install.
apt update
apt upgrade
- Install dpkg-dev and Download Linux Kernel source code and install libssl (Needed for kernel config)
cd /usr/src
apt install dpkg-dev
apt source linux-image-unsigned-$(uname -r)
apt install libssl-dev
- Copy existing kernel configuration and Module.symvers file to linux source directory
cd /usr/src/linux-4.15.0
cp /boot/config-$(uname -r) /usr/src/linux-4.15.0/.config
cp /usr/src/linux-headers-$(uname -r)/Module.symvers /usr/src/linux-4.15.0/
- Generate configuration to allow the nvidia driver to work with our kernel
make oldconfig && make prepare && make modules_prepare
- Edit the /usr/src/linux-4.15.0/include/generated/utsrelease.h file to make the UTS Release number match our kernel. Note you should change the string 4.15.0-55-generic in the example below to match whatever the output is of “echo $(uname -r)”
#define UTS_RELEASE "4.15.0-55-generic"
- Download nvidia driver from website (https://www.nvidia.com/Download/index.aspx?lang=en-us)
- Copy the driver to the mining rig using SFTP
- Change back to the directory with the NVIDIA proprietary driver and make the driver executable
sudo chmod 755 NVIDIA-Linux-x86_64-430.14.run
- Run the NVIDIA proprietary driver installer, specifying the correct GCC version and the path to the linux sources. Accept the defaults in the installer’s menus and complete the installation.
sudo CC=/usr/local/bin/gcc ./NVIDIA-Linux-x86_64-430.14.run --kernel-source-path=/usr/src/linux-4.15.0
- Blacklist the opensource nouveau driver. Create a new file blacklist-nouveau.conf and add the following…
blacklist nouveau
options nouveau modeset=0
- Update the initramfs; otherwise, Ubuntu will still load the Nouveau driver when you reboot.
sudo update-initramfs -u
- Restart the computer
sudo reboot
- Verify all cards are present by running nvidia-smi
nvidia-smi
Software installation steps:
Now that the OS and graphics card drivers are running it is time to install the mining software. Whatever pool you select may have different installation guidelines and requirements. For the purposes of this guide we will detail standing up the Ethermine client (https://ethermine.org/)
-
Download the latest version of Ethermine from the releases page. (https://github.com/ethereum-mining/ethminer/releases) and copy the archive to the rig via sftp (or wget/curl the archive direct to the rig from the website)
-
Extract the archive
tar xzf ethminer-0.17.1-linux-x86_64.tar.gz
- Run a test of the client using the following command to ensure your system behaves normally. If your power supply is bad or your system is otherwise not able to cope with the power demands this is where you will see it as your machine may very likely reboot or shutoff.
bin/ethminer -U -M 1
-
Copy bin/ethminer to /usr/bin/ethminer
-
Create a file called eth-miner.service with the contents below. Be sure to replace with the name of the user’s home directory you are using. Also, change the string “0x34e287e0f6f14449288caf7d52bff046f379069a.gpurig3” to your public ethereum address and machine name.
[Unit]
Description=Mine Ether

[Service]
Environment=GPU_FORCE_64BIT_PTR=0
Environment=GPU_MAX_HEAP_SIZE=100
Environment=GPU_USE_SYNC_OBJECTS=1
Environment=GPU_MAX_ALLOC_PERCENT=100[Unit]

Environment=DISPLAY=:0
Environment=XAUTHORITY=/home/<USER>/.Xauthority

WorkingDirectory=/home/<USER>
ExecStart=/bin/bash --login -c "ethminer -U --farm-recheck 200 -P stratum1+ssl://0x34e287e0f6f14449288caf7d52bff046f379069a.gpurig3@us1.ethermine.org:5555"

Restart=always

[Install]
WantedBy=multi-user.target
-
Copy the eth-miner.service file to /etc/systemd/system/eth-miner.service
-
Reload the systemd unit files
sudo systemctl daemon-reload
- Start the eth-miner service
sudo service eth-miner start
- Monitor the logs to see that the service connects properly and begins mining. If all goes well you should see the hashrate of your mining rig spit out periodically.
journalctl -u eth-miner.service -f
- After about 5 to 10 minutes you should see your hashrate appear publicly on Ethermine (e.g. https://ethermine.org/miners/34e287e0f6f14449288caf7d52bff046f379069a/dashboard)